
The consoleDrive from the cockpit
Drive from the cockpit
Arm the robot, move it with the jog, the IK handles and named poses, and watch its joints and cameras, with the API call behind every control.
The Control page is the cockpit. You arm the robot there, move it, and watch everything it measures. Each control is a call into the same makiina.robot API your scripts use, and this page puts the two side by side, so you can try a move in the console and then write it in code.
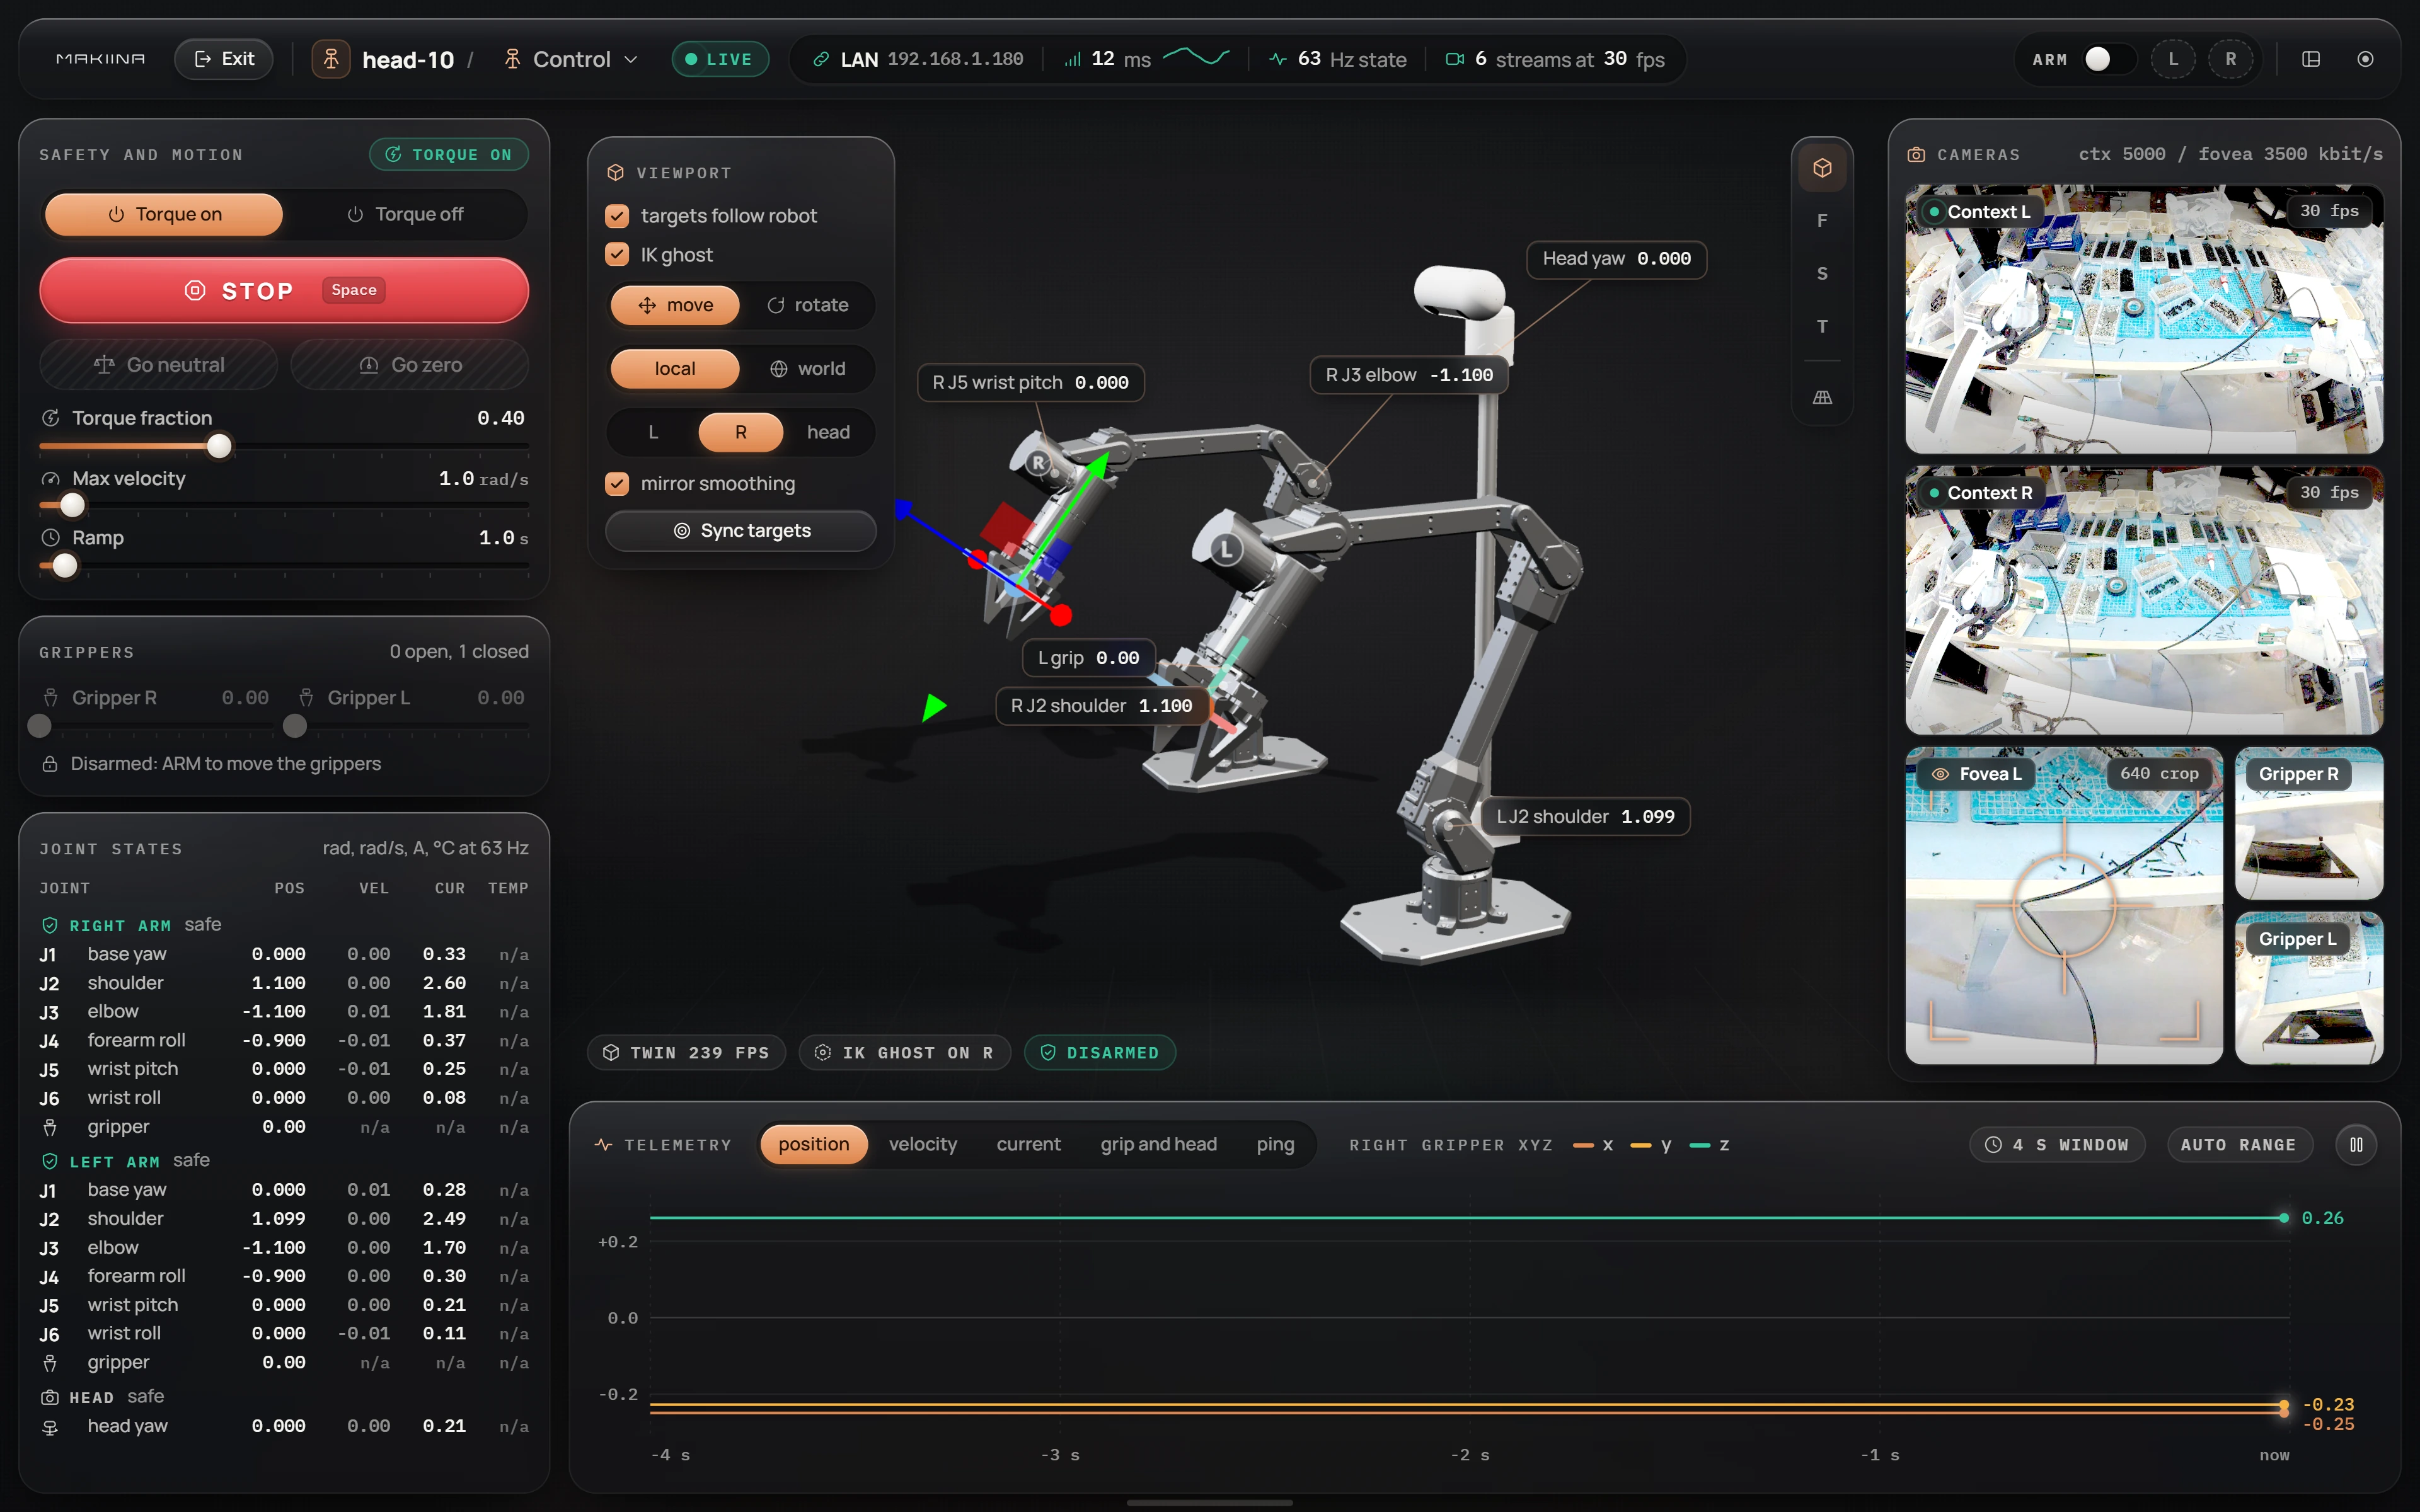
The page is laid out the same way for an arm on your PC and for a robot in your fleet:
- Top bar: Exit, the robot's name and page menu, the connection readout, and the ARM switch on the right.
- Left: Safety and motion, Grippers, and the Joint states table.
- Centre: the 3D twin of the robot, which mirrors the measured joints, with the Viewport card and view buttons beside it.
- Right: the camera feeds (robots with a head).
- Bottom: telemetry plots.
Arm the robot, and stop it
When a session starts, the robot reports but cannot move: the console sends no motion until you flip ARM on. The L and R chips next to it gate each arm on its own. A gated arm ignores every command from the console and holds where it is, which is useful when you want to work with one arm while the other stays put.

Flip ARM on to allow motion, off to stop and hold. Press Space or click STOP to cancel a running move; the robot holds where it is.
In code there is no switch: the first motion command arms the session, and stop() disarms it again.
robot.control.set_joints_relative({"J01-R": 0.05})   # arms the session
robot.control.stop()                                  # holds, ignores motion
Turning ARM off does not release the motors. The robot keeps holding its last pose, energised, until you arm again or turn the torque off.
Set torque and speed limits
The Safety and motion card holds the two limits the robot enforces on its own side, whatever the console or a script asks for.
Torque fraction caps the current of every joint at a fraction of its limit. Max velocity caps how fast any joint turns, in rad/s at the joint. Torque on and Torque off energise or release the motors.
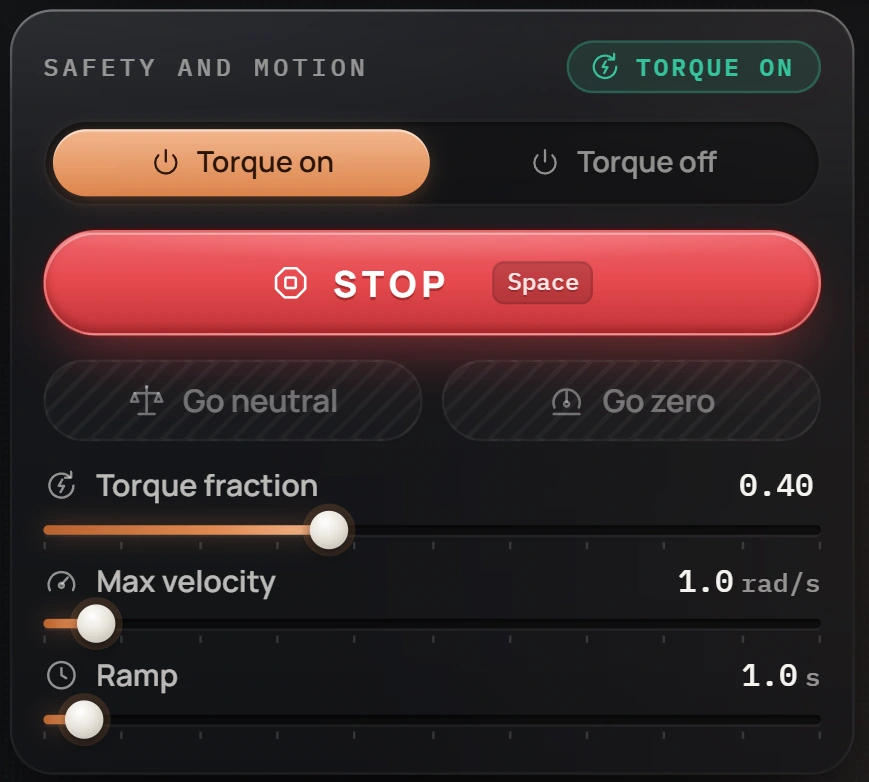
robot.safety.set_torque_fraction(0.4)
robot.safety.set_max_joint_velocity(1.0)     # rad/s
robot.safety.torque_off()                    # the arm sags, hold it
robot.safety.torque_on()
A torque fraction of 0.3 to 0.5 and a velocity of 0.5 to 1.0 rad/s are good settings for bench work: strong enough to move the arm, slow enough to watch, weak enough that a collision stalls instead of damaging anything.
Go to neutral or to zero
Go neutral folds the arms into their ready pose. Go zero stretches them straight out and turns the head to face forward. Both start from where the robot is measured to be and ease in and out over the time set by Ramp, in seconds. You need to arm first.
Set Ramp to 2.0 s and click Go neutral.
The console streams a smoothstep ramp at 50 Hz from the measured pose:
import time

target = robot.model.named_poses()["neutral"]
start = robot.sensors.get_joints()
for k in range(1, 101):                       # 2 s at 50 Hz
    a = k / 100
    a = a * a * (3 - 2 * a)                   # smoothstep
    robot.control.set_joints_absolute(
        {j: start[j] + a * (target[j] - start[j]) for j in target})
time.sleep(0.02)Jog one joint
Click a row in Joint states to select that joint. The twin highlights it and the Jog card opens.
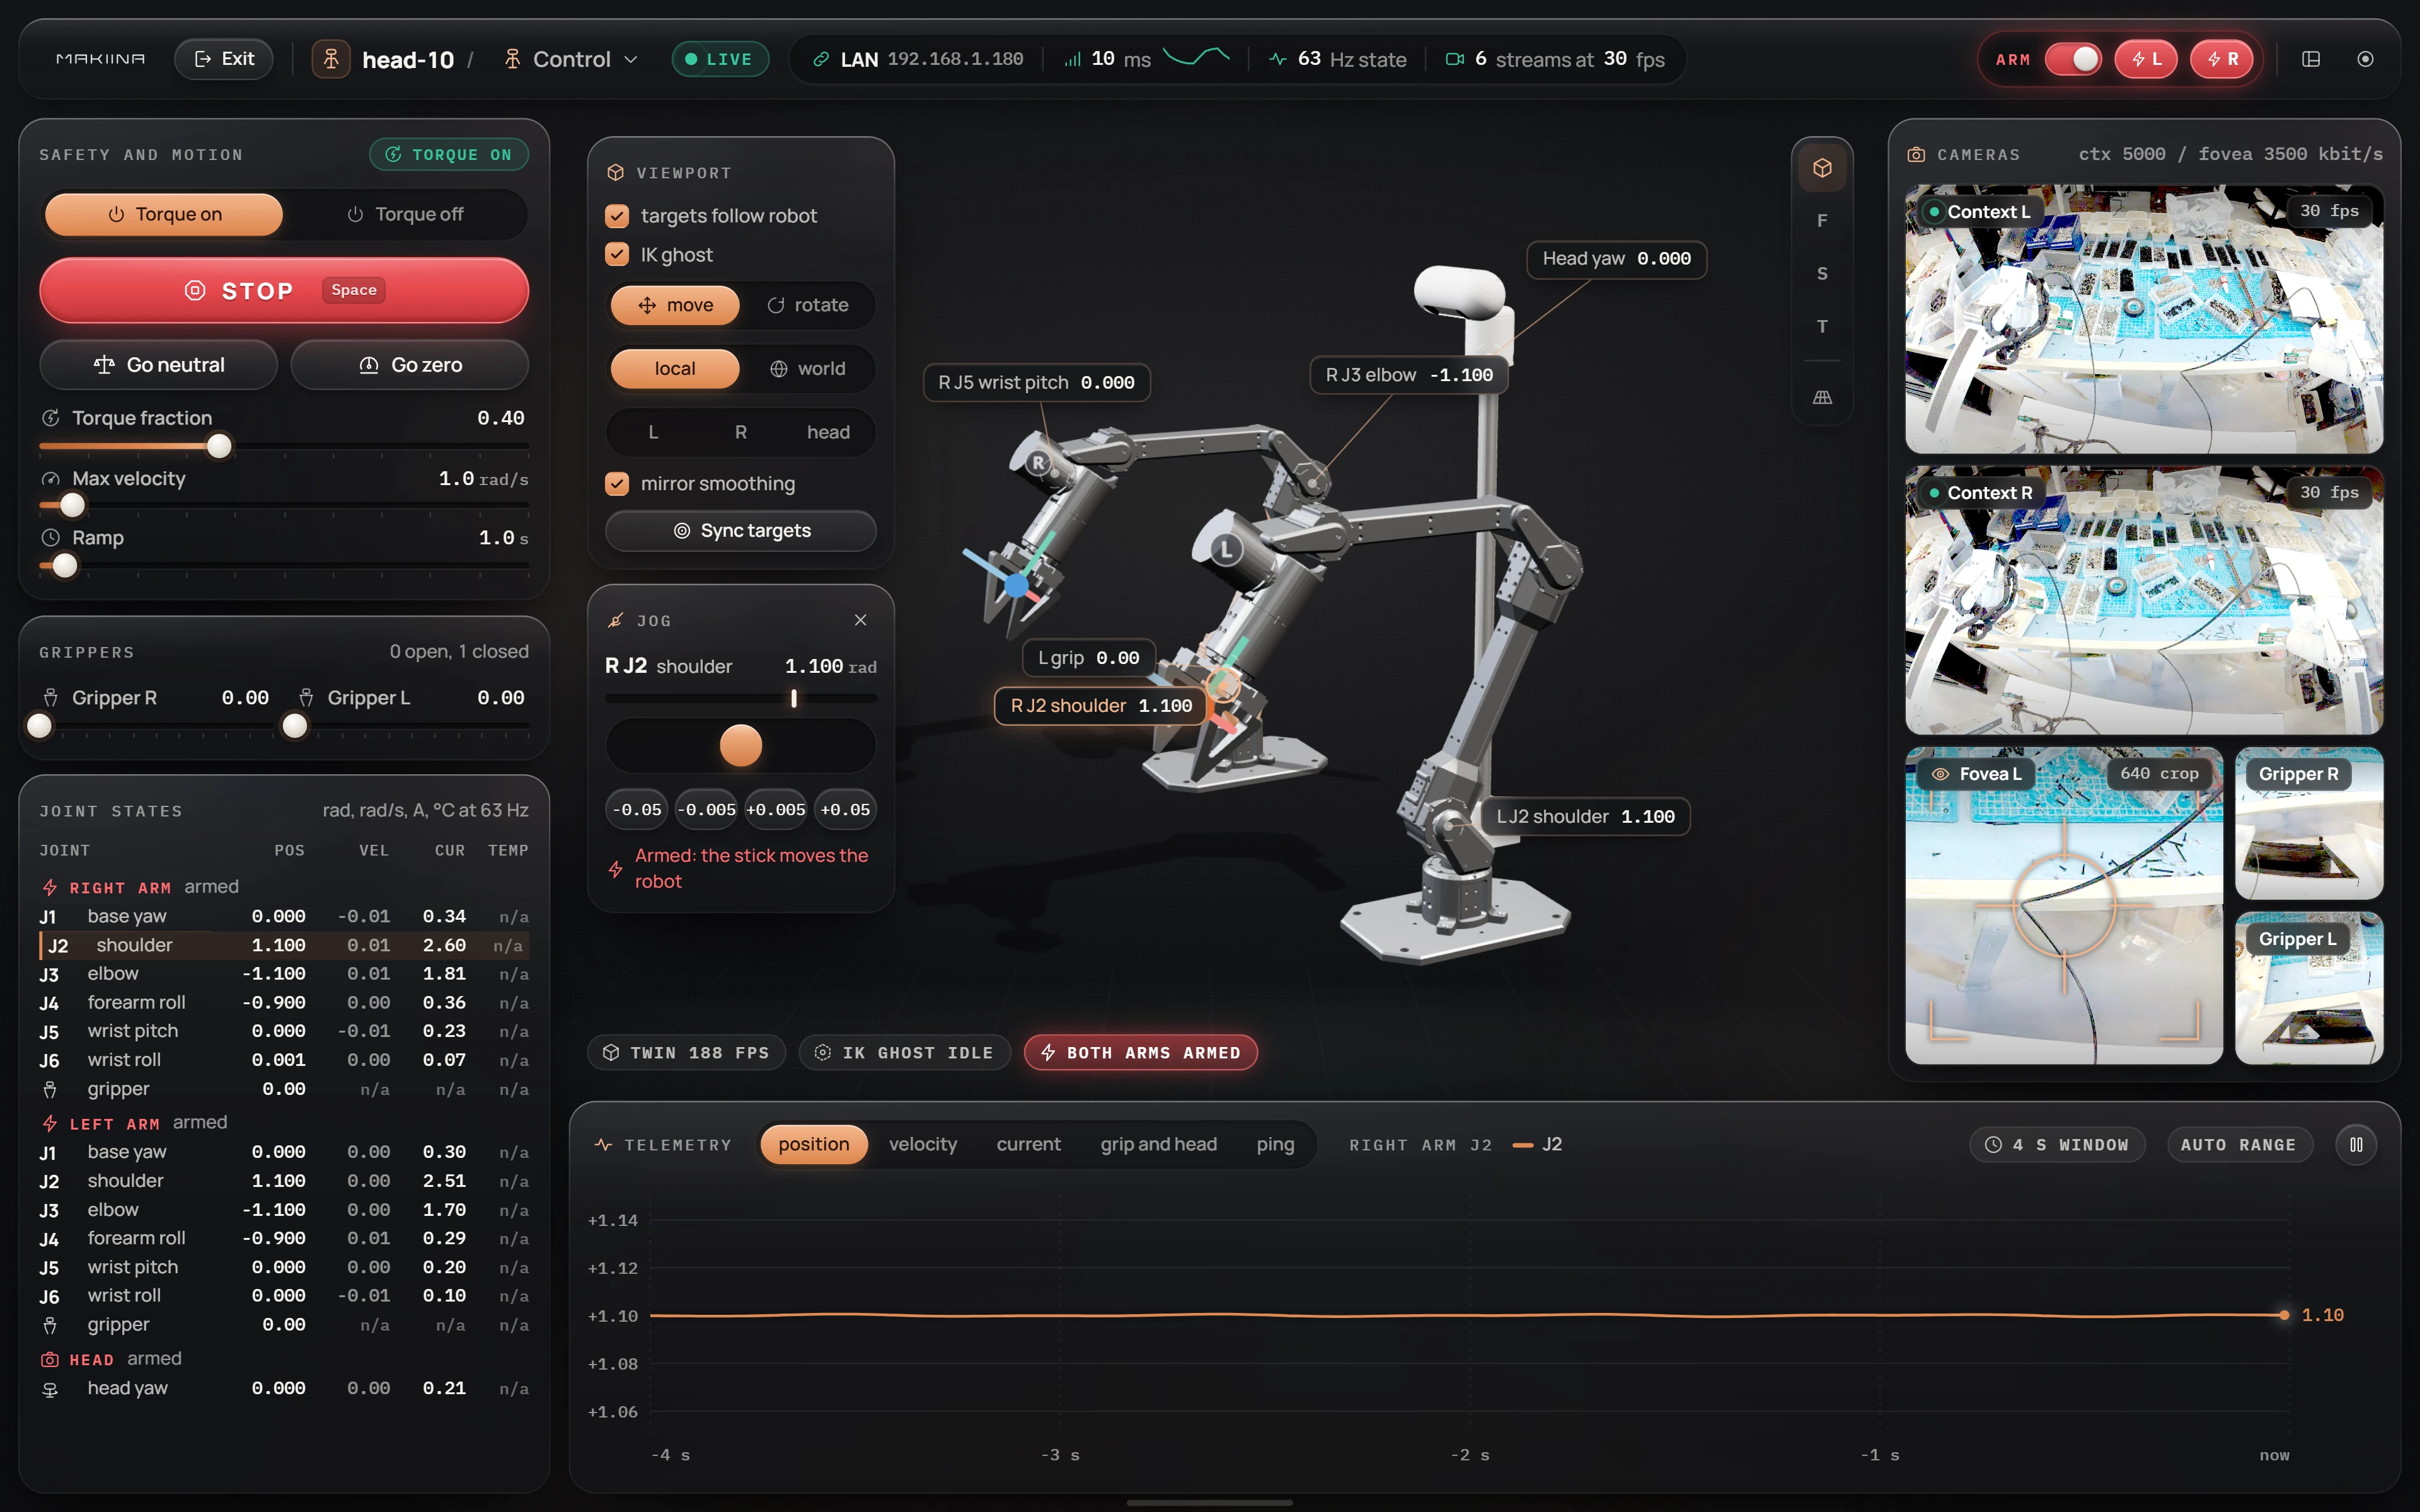
Use the step buttons to move by 0.005 or 0.05 rad, or hold the stick and pull: the further you pull, the faster the joint turns, and it stops when you let go. The head row jogs the head's yaw the same way.
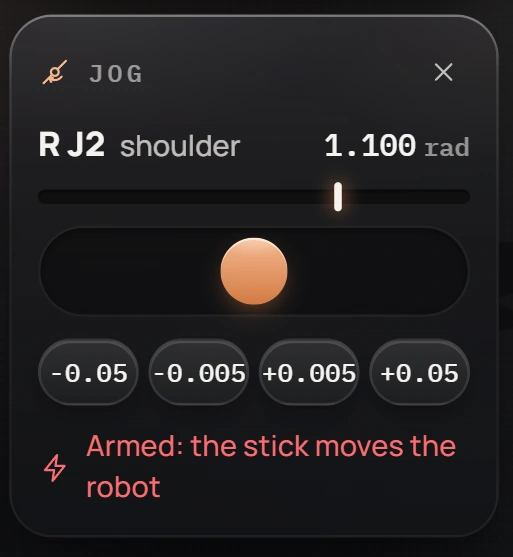
Every jog step is one absolute target for the selected joint:
robot.control.set_joints_absolute({"J02-R": 1.15})   # a joint, in rad
robot.control.set_head(0.2)                          # head yaw, rad, + is right
Move a gripper in space
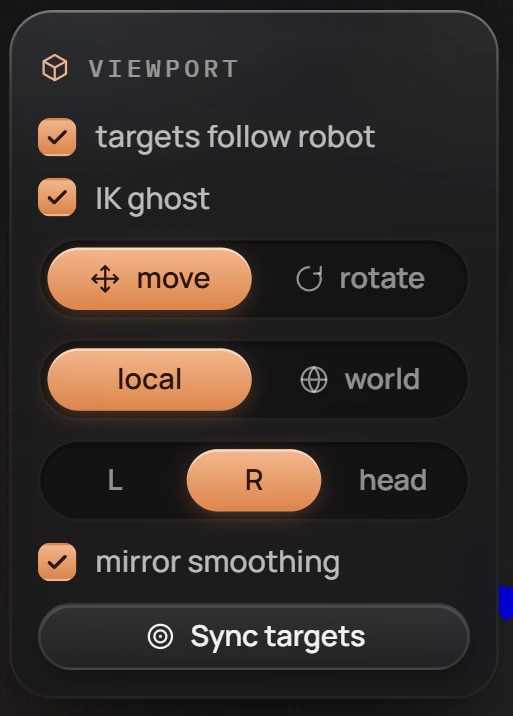
The handles on the twin let you place a gripper in space and let the kinematic twin work out the joints. In the Viewport card choose which handle to show (L, R or head), whether it moves or rotates (W and E switch between them), and whether it follows the gripper's own axes (local) or the robot's (world).
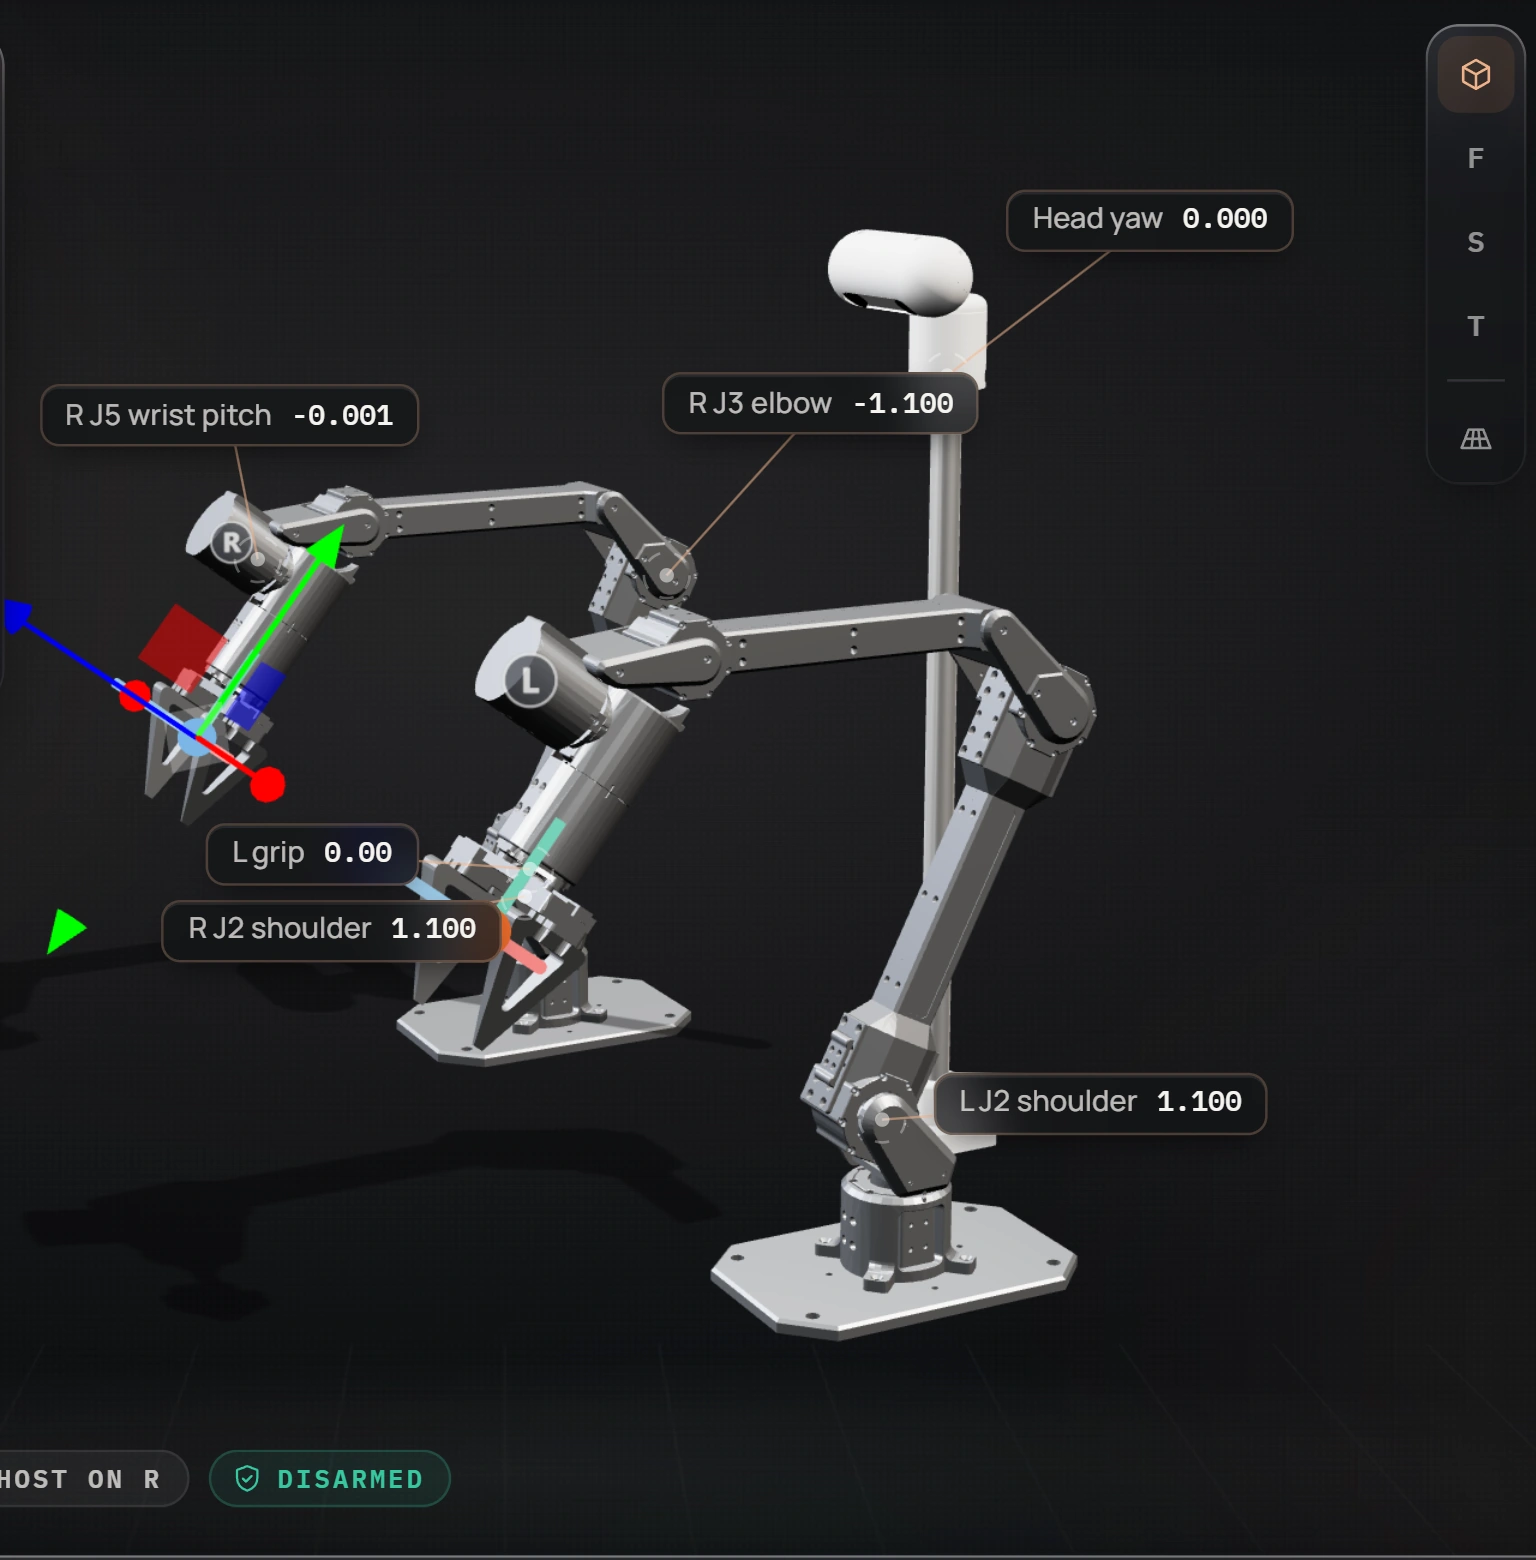
While disarmed, dragging a handle only previews: a copper ghost shows the joint angles that would reach it, and nothing moves. Once armed, dragging the handle moves the arm.
import numpy as np

pose = robot.sensors.get_ee_poses()["right_arm"]     # 4x4, metres
pose[2, 3] += 0.03                                   # 3 cm up
q = robot.model.solve_ik({"right_arm": pose})        # preview only
robot.control.set_ee_poses_absolute({"right_arm": pose})
targets follow robot keeps the handles on the measured grippers while you are not dragging them. Sync targets snaps them back onto the twin if they drifted away. Move the gripper in space covers poses and frames in detail.
Open and close the grippers
The Grippers card has one slider per gripper, from 0 (open) to 1 (closed). They are locked until you arm.
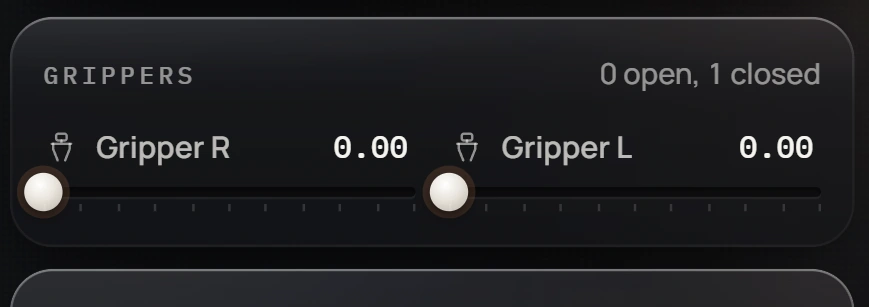
robot.control.set_ee_triggers({"right": 0.6, "left": 0.0})The robot maps the 0 to 1 range onto the gripper's own travel, so the same value means the same closure on every arm.
Read the joints
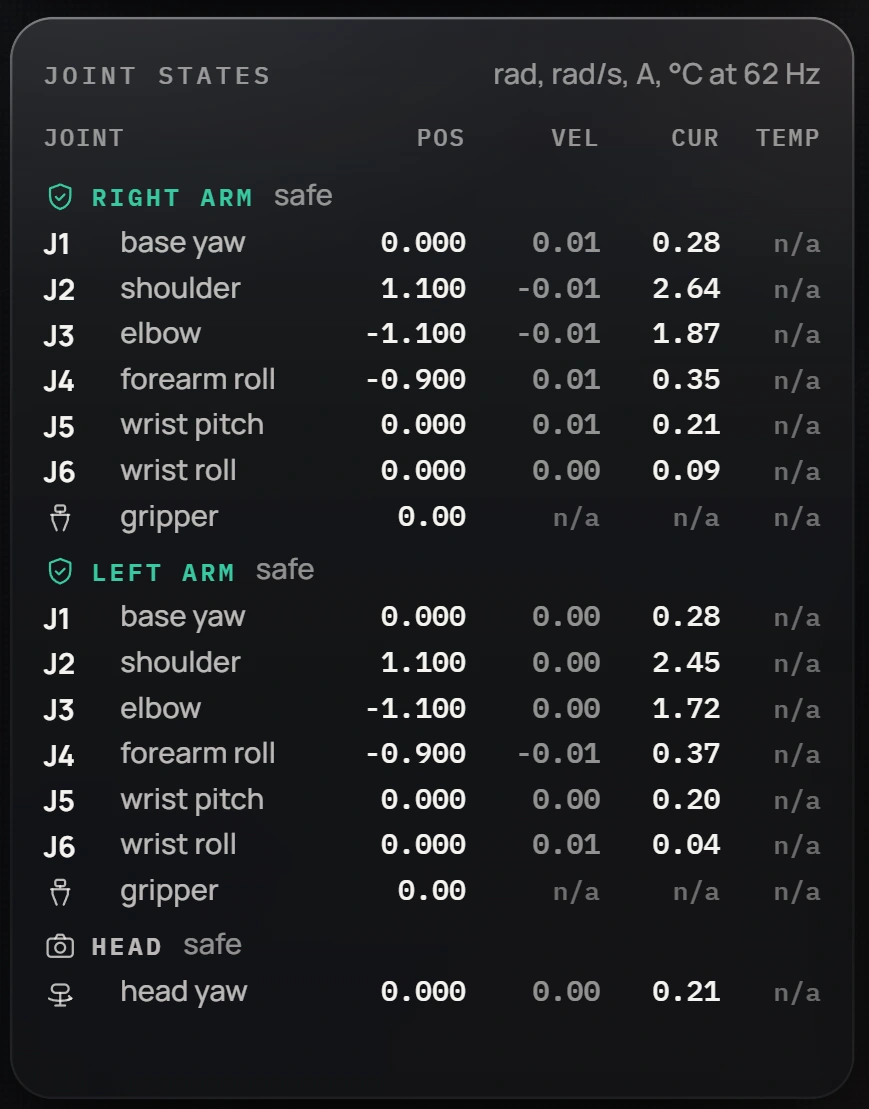
Joint states lists every joint with its measured position (rad), velocity (rad/s) and current (A), refreshed at the rate the robot reports, usually around 60 Hz. The joints are grouped by part, and each part says whether it is safe (disarmed) or armed. The twin carries callouts with the live values of the joints you selected.
robot.sensors.get_joints()        # {"J01-R": 0.0, ...} rad
robot.sensors.get_velocities()    # rad/s
robot.sensors.get_currents()      # A
robot.sensors.get_head()          # head yaw, rad
Watch the cameras and steer the foveas
On a robot with a head, the right column shows both context cameras, a fovea view and the two gripper cameras. The fovea is a sharper crop of the context image that you can point anywhere: click in either context view and the fovea moves there. The fovea card switches between the left and right eye.
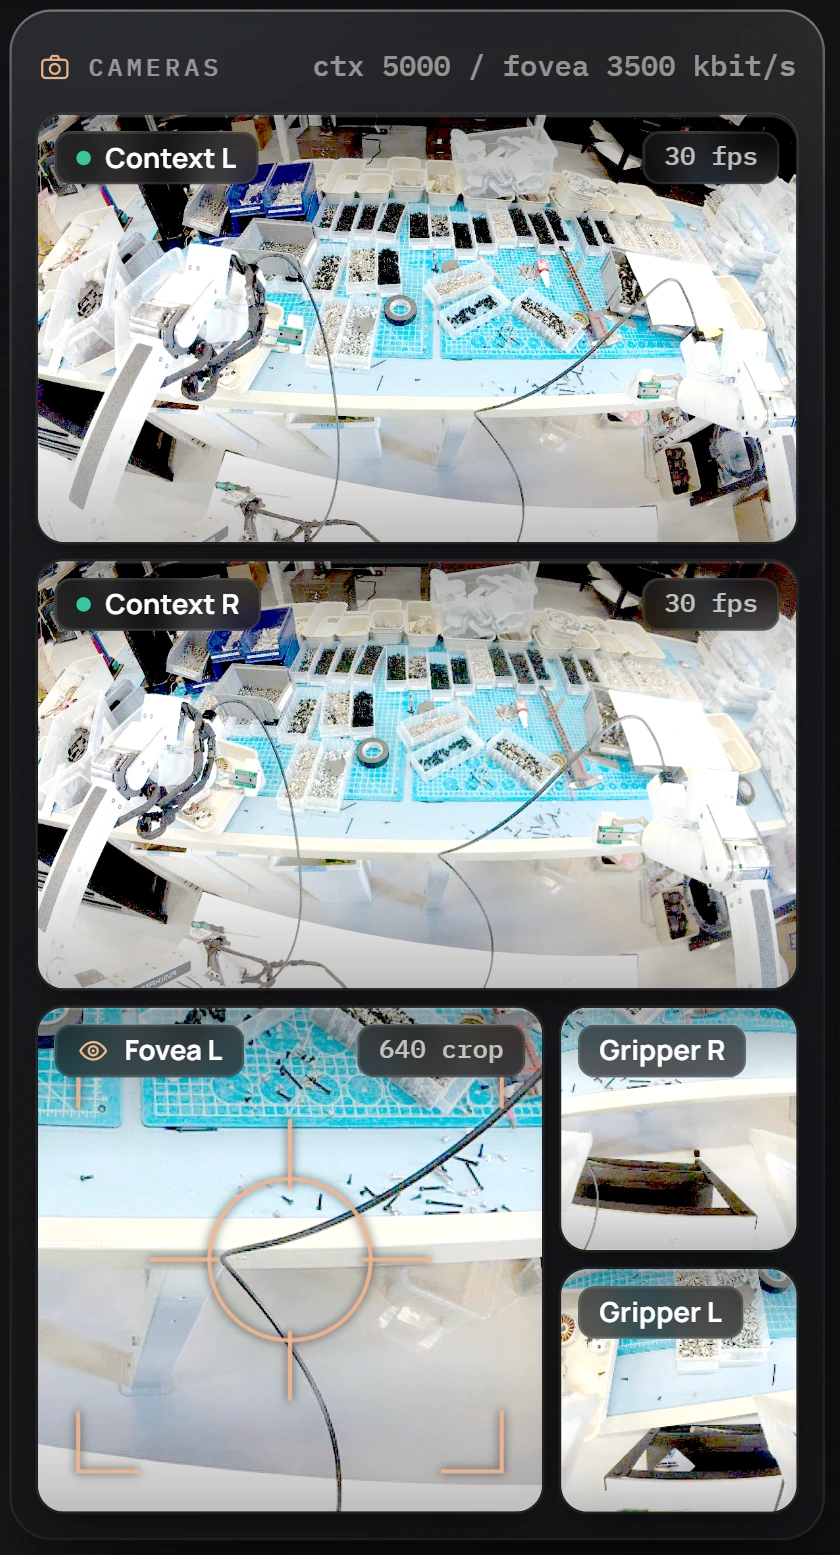
frames = robot.sensors.get_camera_frames()   # {stream: HxWx3 RGB array}
frames["stereo_cam_left"].shape              # (648, 1152, 3)

robot.control.set_gaze([0.5, 0.5, 0.5, 0.5]) # right x, y, left x, y in 0..1
Click the bitrate readout at the top of the camera column to open the camera settings.
The bitrates apply at once. Fovea picks a 640 px window steered by head gaze or a 320 px one for eye tracking. Apply camera parameters sends exposure, gain and sharpness; the robot restarts its camera pipelines, so the streams blink for a moment, and it keeps the values.
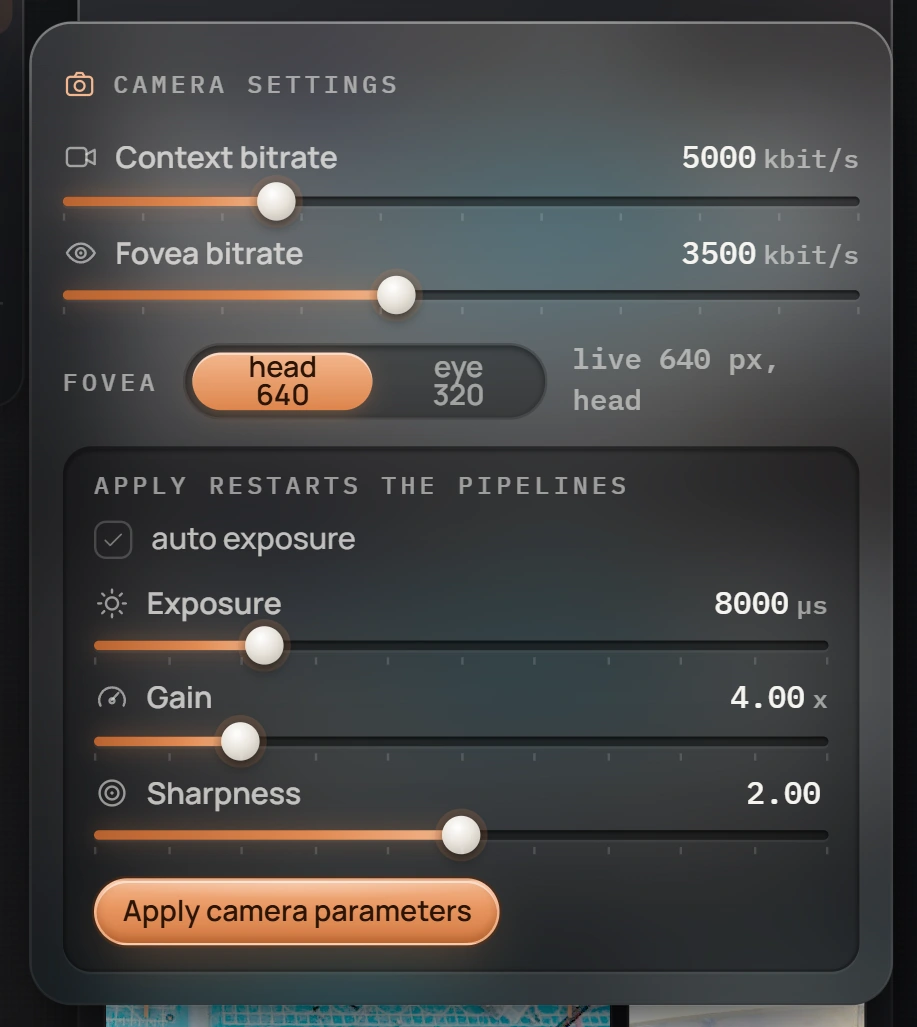
robot.control.set_video_bitrates(context=5000, fovea=3500)   # kbit/s
robot.control.set_gaze_method("HeadsetOrientation")          # 640 px fovea
robot.control.set_camera_params({"ae_enable": False,
                                 "exposure_time": 8000,       # us
                                 "analogue_gain": 4.0,
                                 "sharpness": 2.0})
See what the robot sees shows how to work with the frames in code.
Plot the telemetry
The telemetry band plots the last few seconds of whatever you selected: position, velocity, current, grip and head, or ping. With a joint selected it plots that joint; otherwise the position tab plots the right gripper's x, y and z.
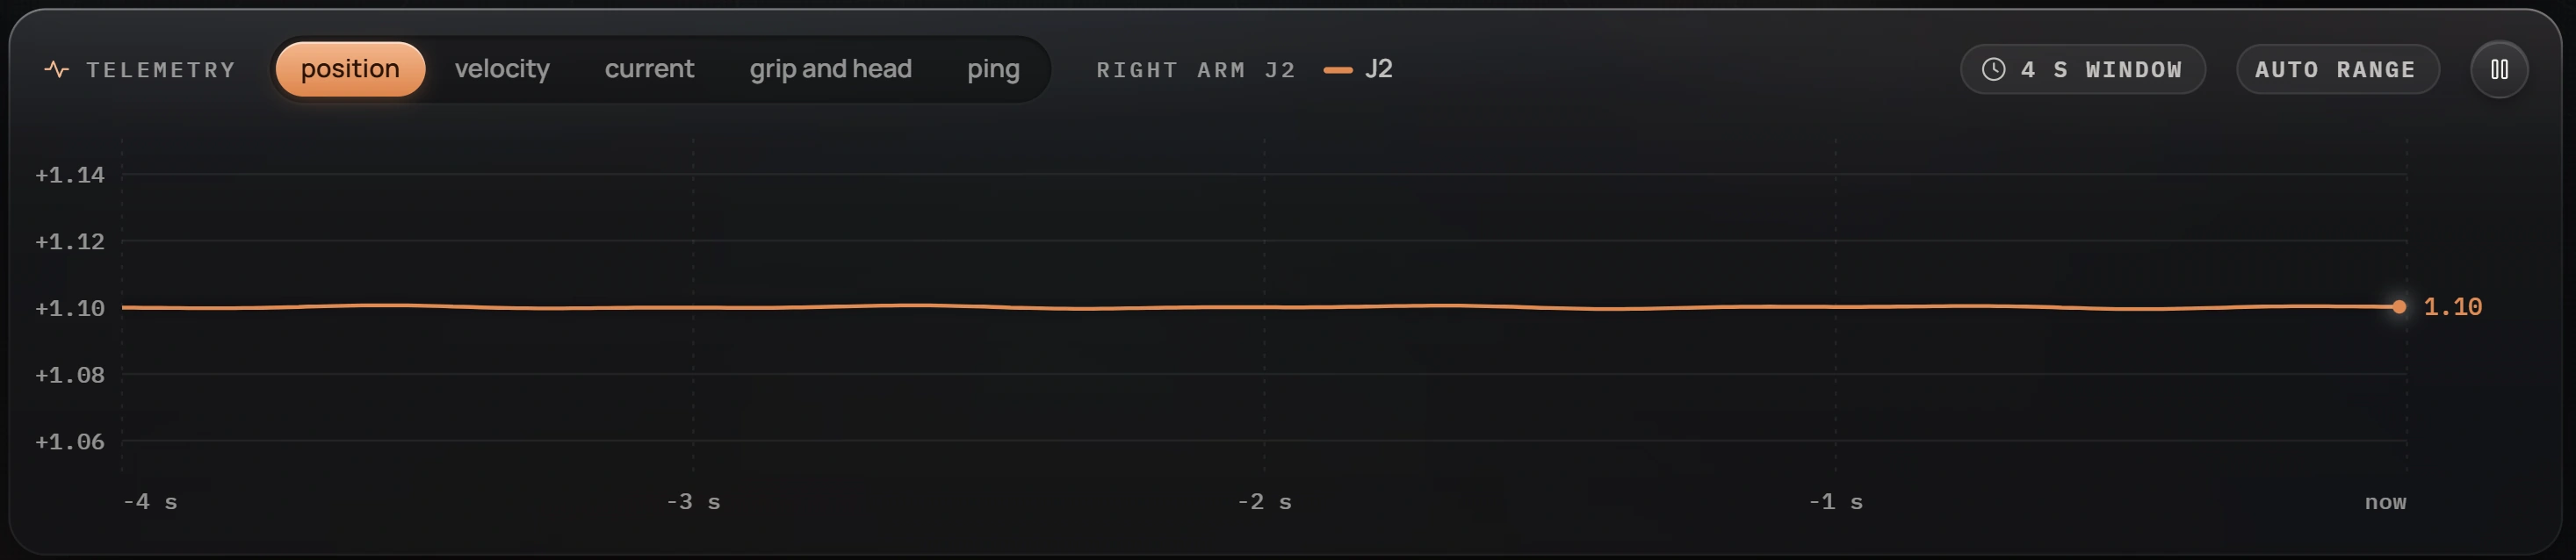
The window chip switches between 4, 8 and 12 seconds. auto range fits the plot to the data; turn it off to pin a minimum and maximum for that tab. The pause button freezes the plot while you read it.
Record a demonstration
On a fleet robot the record button in the top bar opens the recording card, and records every camera stream and every command of the session. Record demonstrations describes it together with the recording API.
Change the view
The buttons beside the twin switch between a perspective view and front (F), side (S) and top (T) views, and turn the floor grid on and off. The layout button in the top bar widens the twin and hides the cameras and telemetry. mirror smoothing adds 20 ms of display smoothing to the twin; the numbers in the table are never smoothed.
Keyboard shortcuts
| Key | Does |
|---|---|
| Space | STOP: cancel a running move and hold |
| W, E | handle mode: move, rotate |
| Esc | close the open card; cancel a session start |
| [, ] | previous and next page |
| Arrow keys | nudge the focused slider |
Shortcuts are ignored while you type in a field.