
Get startedMove your first arm
Move your first arm
Connect to an arm on your PC, move a joint from the Robot Console, then do the same in a short Python script.
In the next ten minutes you connect to an arm plugged into your PC, move one of its joints from the Robot Console, and then move it again from Python. You need the SDK installed (Install the SDK) and the arm on a clear bench, with a hand near its power switch.
Plug in the arm
Connect the arm's 24 V supply and switch it on. Plug its USB CAN adapter into your PC. The arm arrives calibrated, so every board already knows which joint it drives and where its zero is. There is nothing to configure.
Open the Robot Console
Double-click RobotConsole.bat in the kit folder (./robot_console.sh on Linux). Your browser opens http://127.0.0.1:8726 on the console's landing page. On this PC shows what it found on your USB CAN adapters.
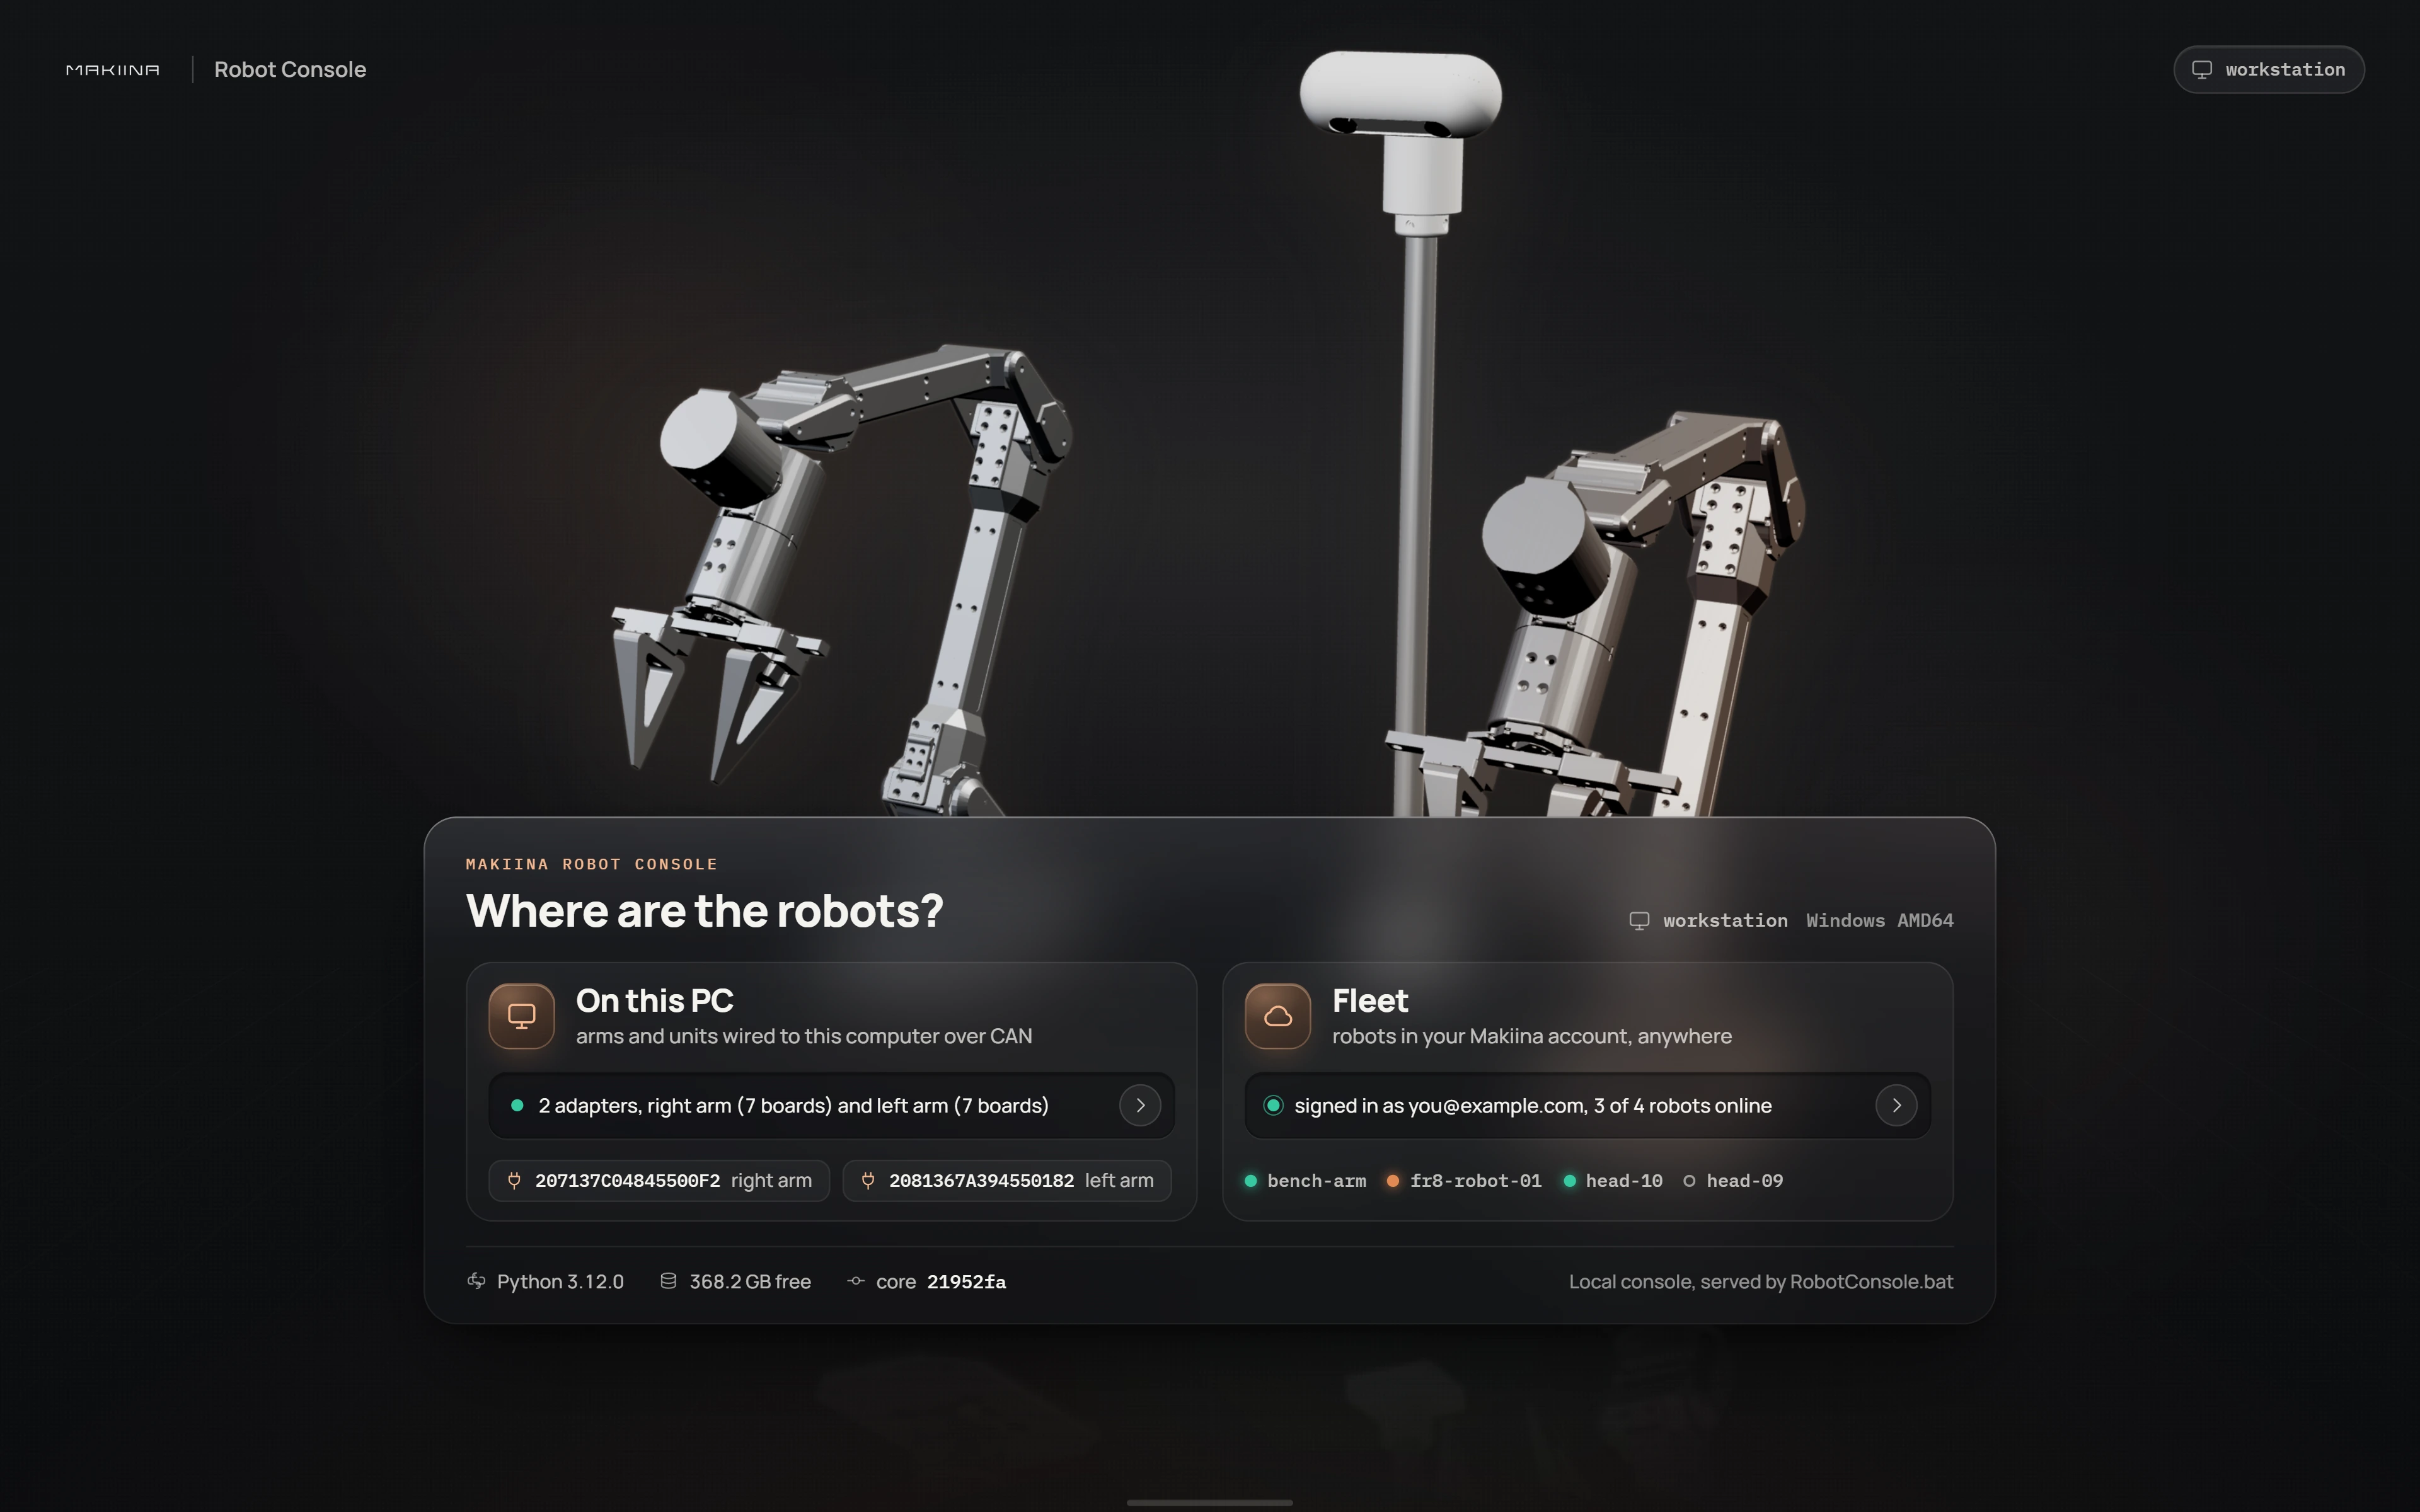
Click On this PC. Each arm gets a row with its adapter, its seven boards (J1 to J6 and the gripper) and Ready once they all answered.
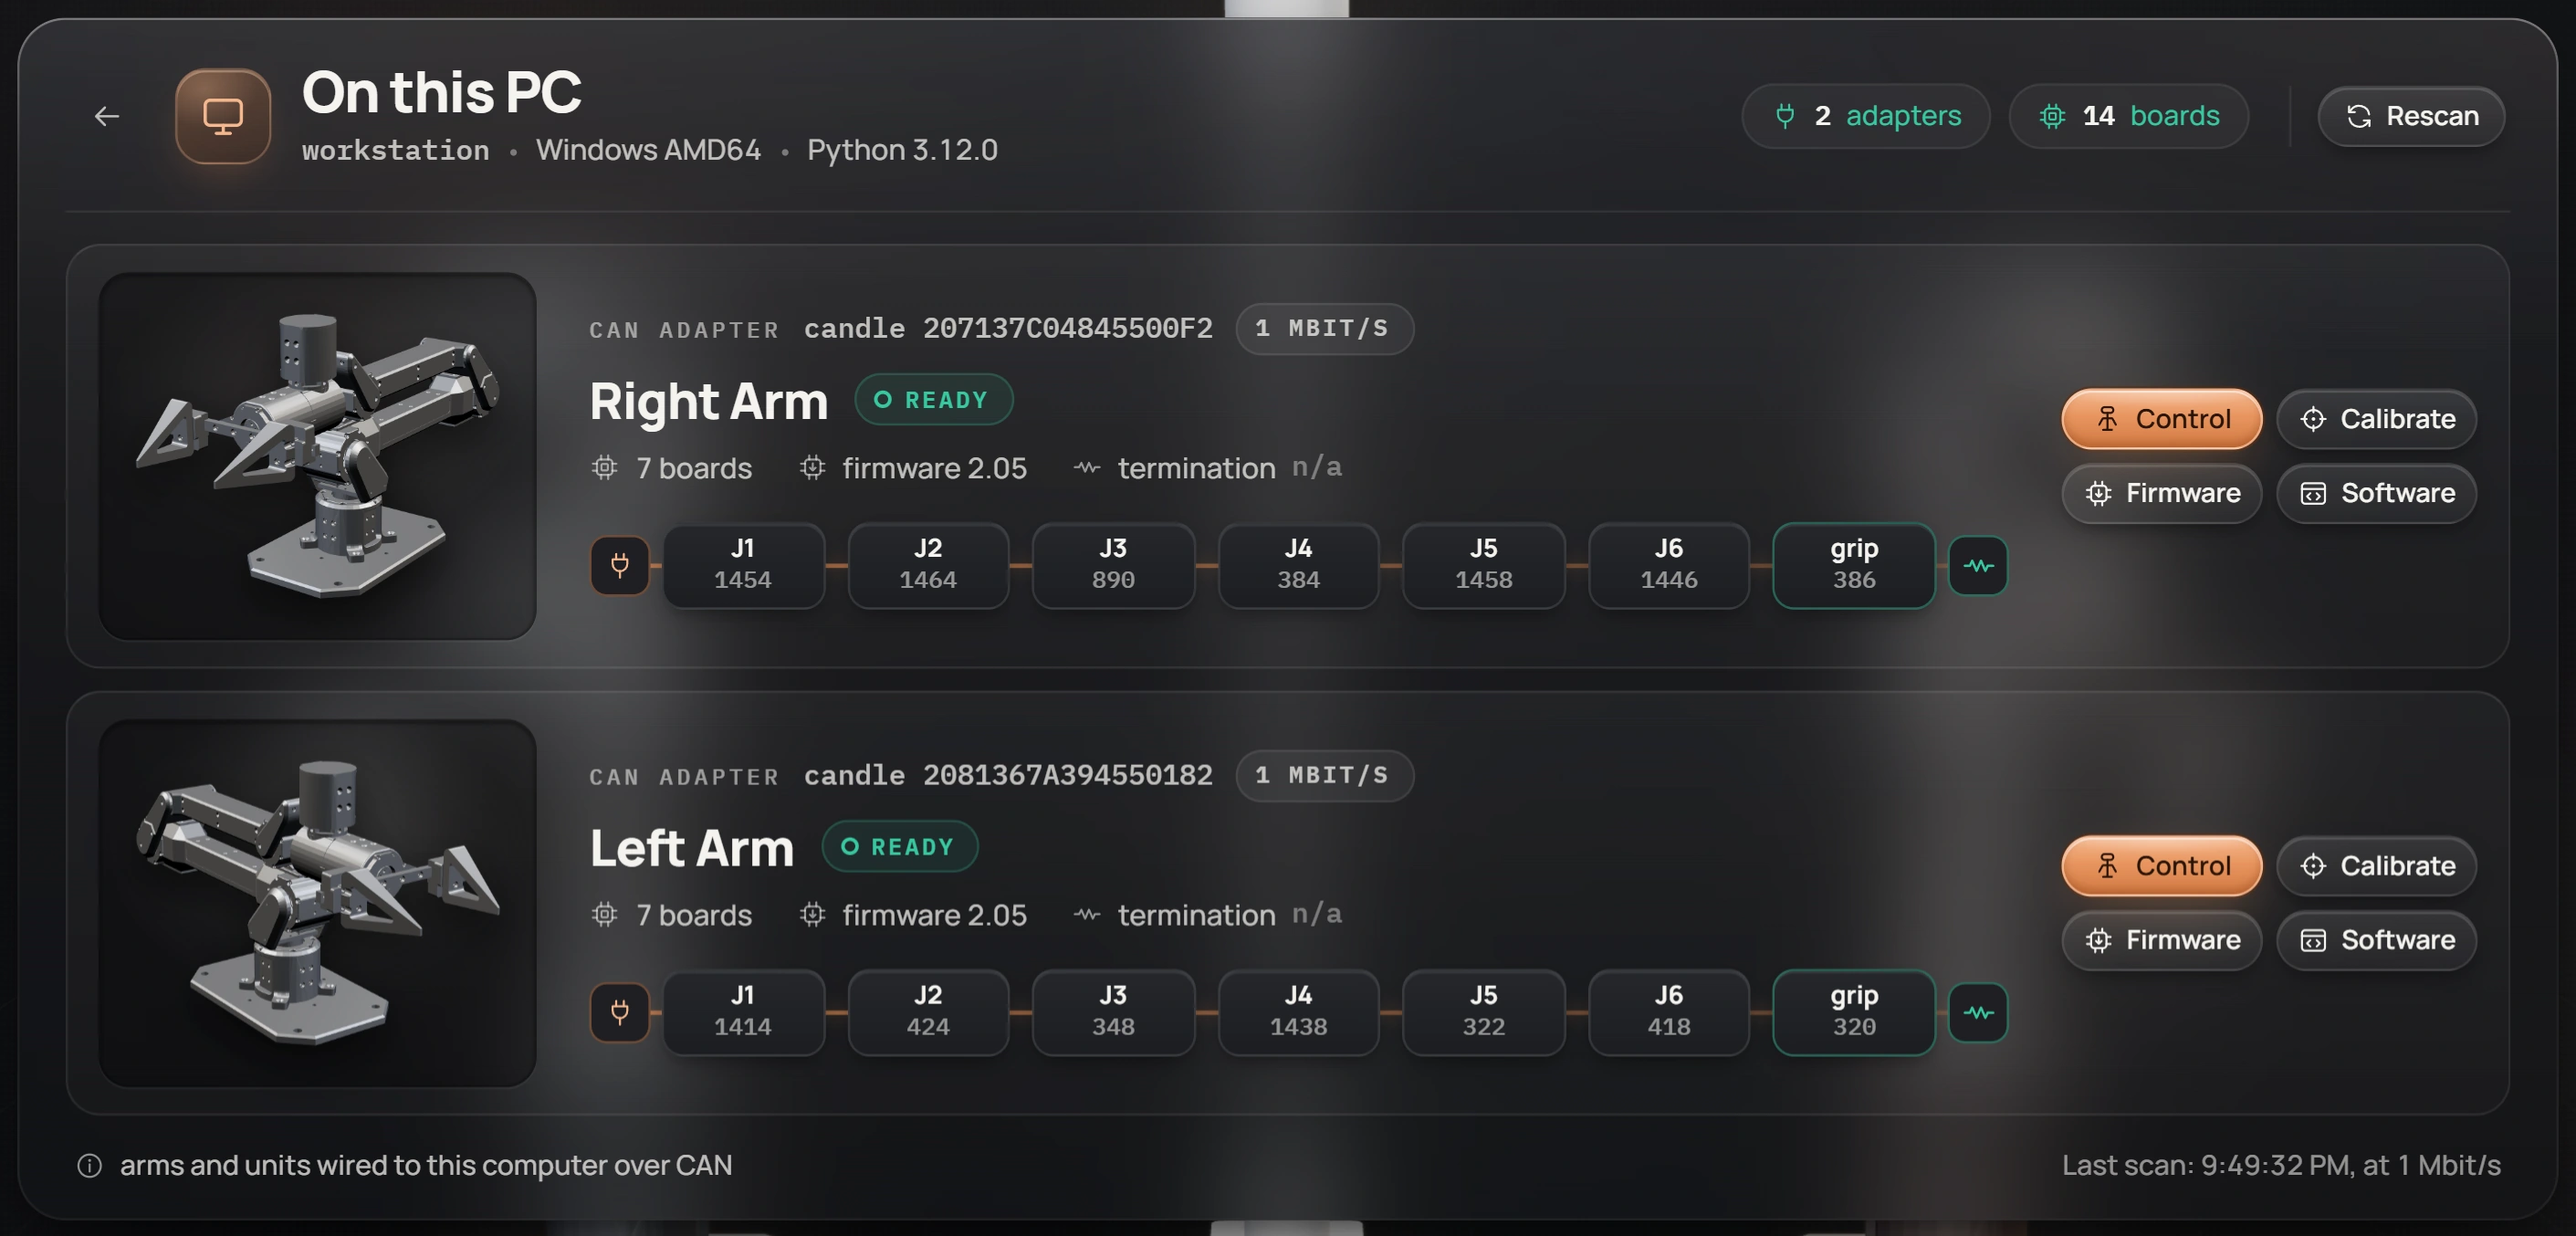
Click Control on the arm's row. The console starts a session on your PC and opens the cockpit.
Look around before you move
The cockpit shows the arm as it is right now: the 3D twin follows the real joints, the table on the left lists every joint's position, velocity and current, and the telemetry at the bottom plots them.
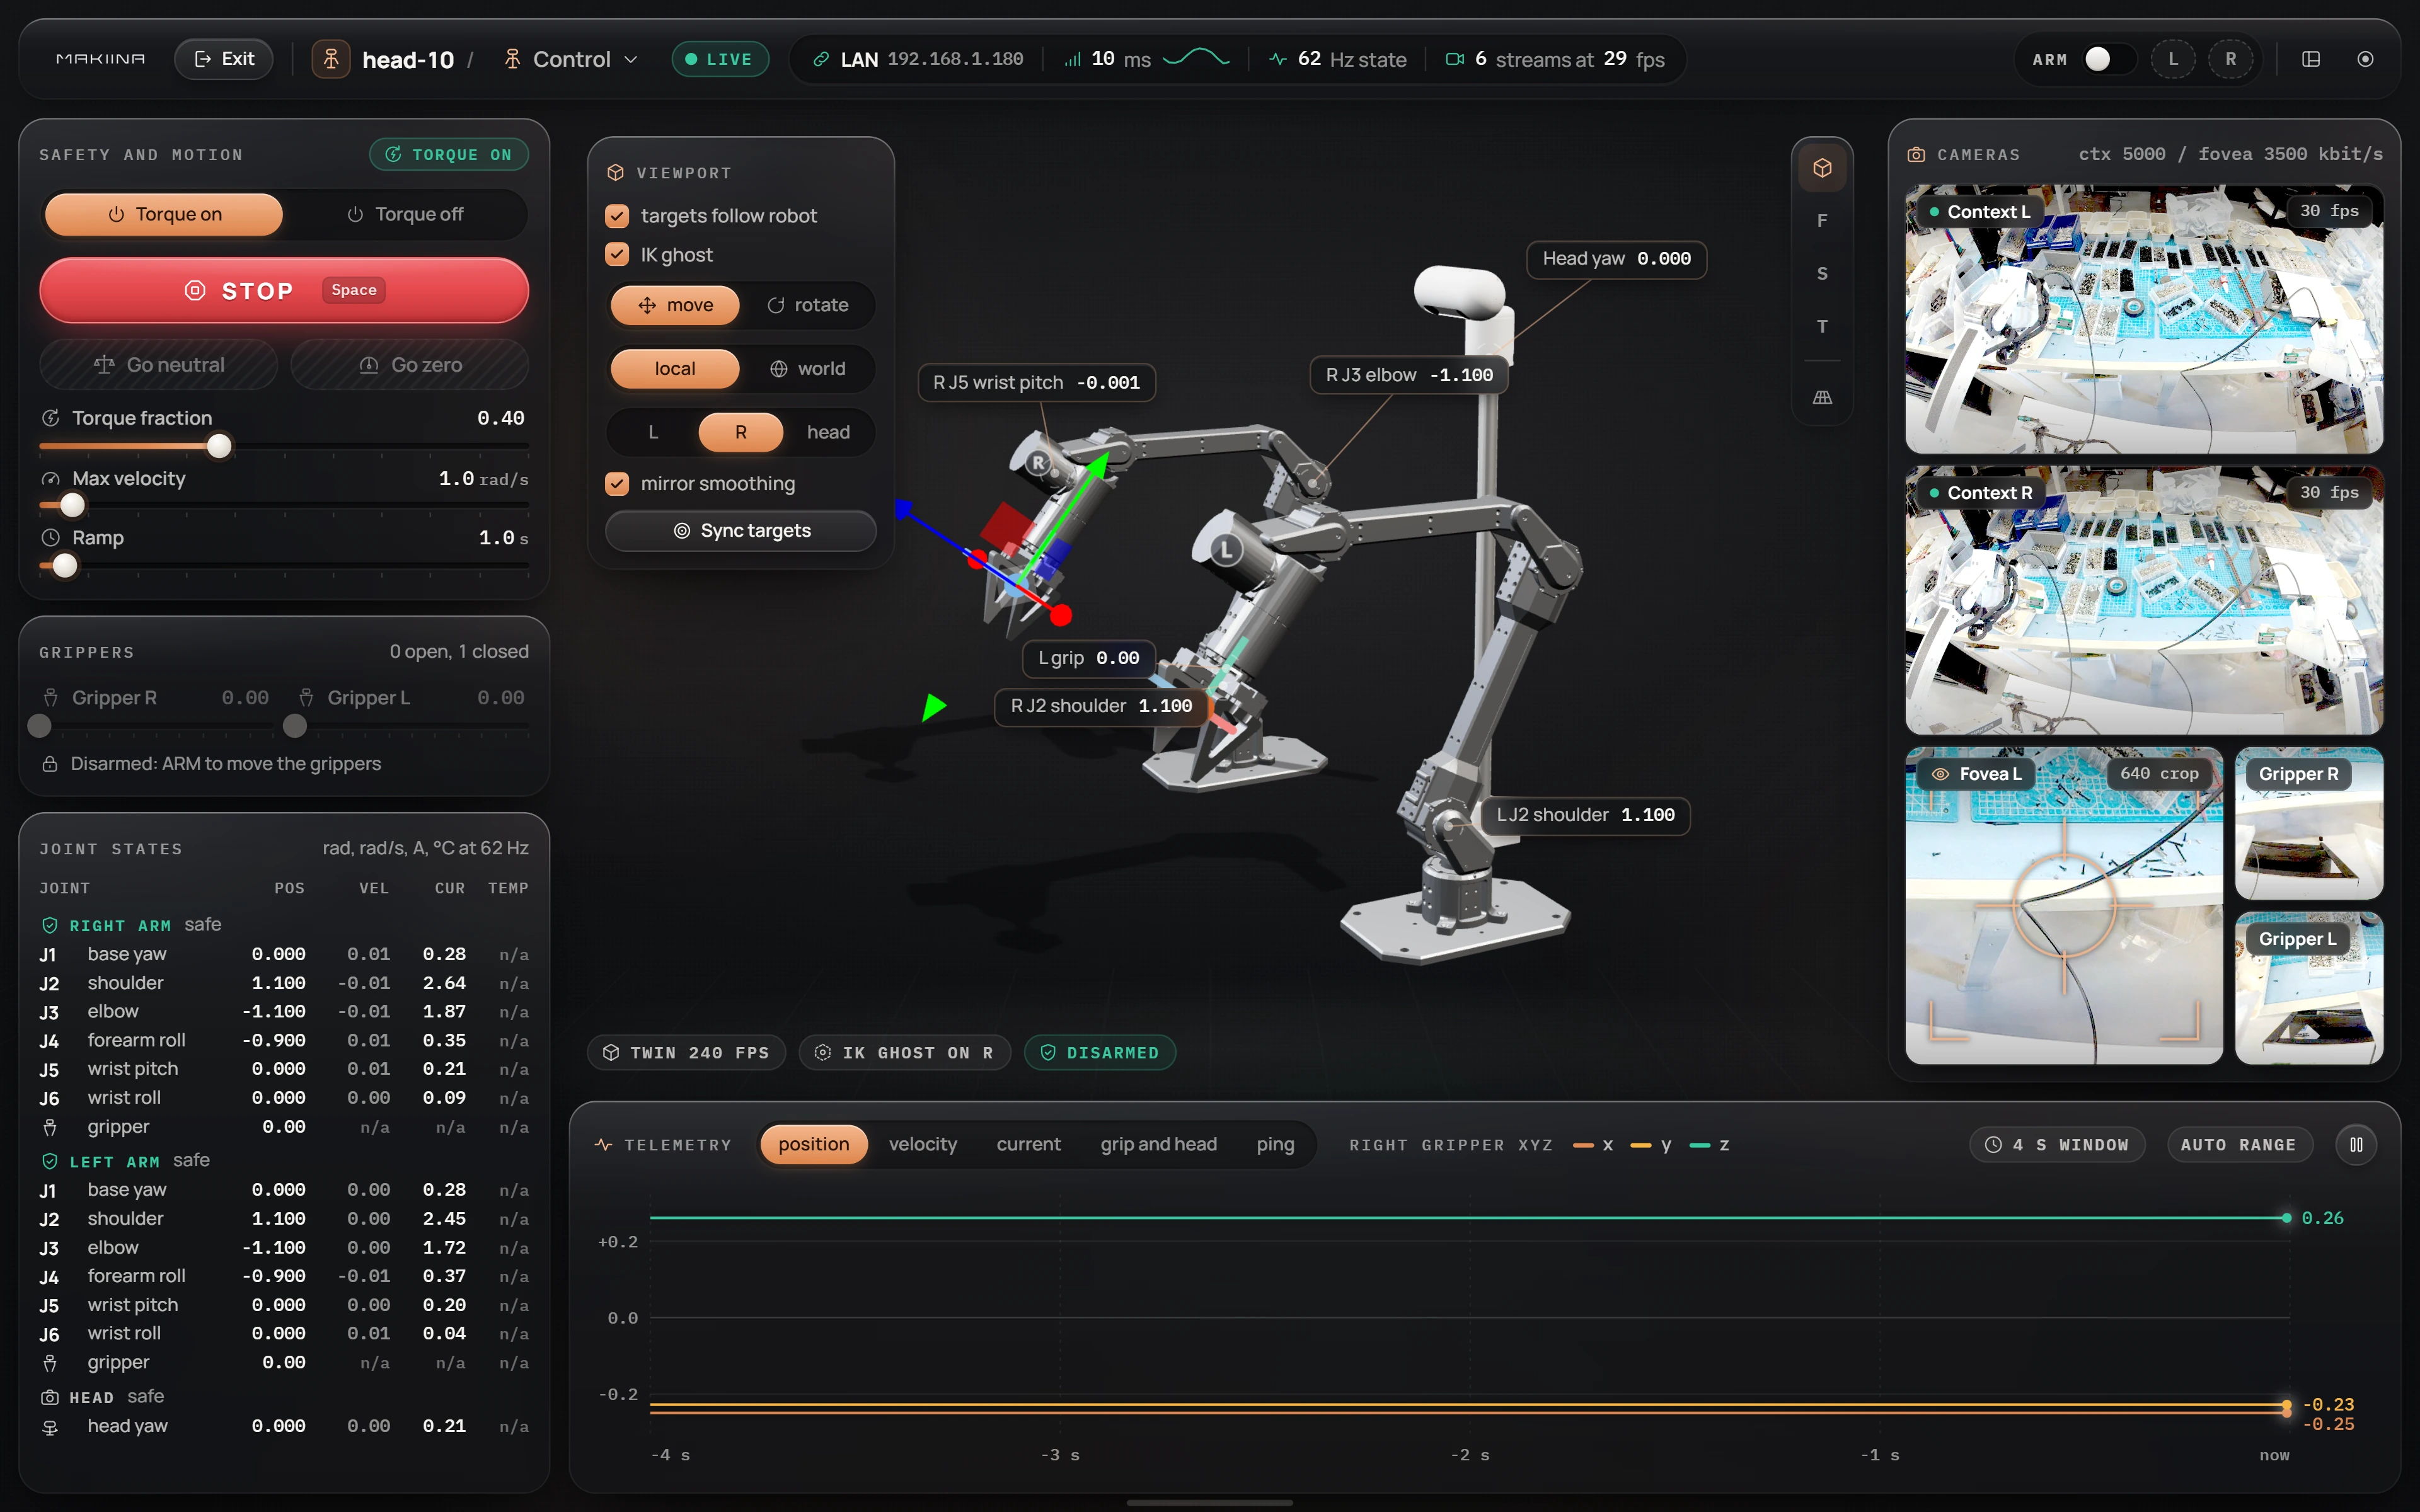
Nothing can move yet. The ARM switch in the top right corner is off, and while it is off the console sends no motion at all. Try this first: click Torque off, move the arm gently by hand and watch the twin follow, then click Torque on so the arm holds wherever you left it.
Set the limits
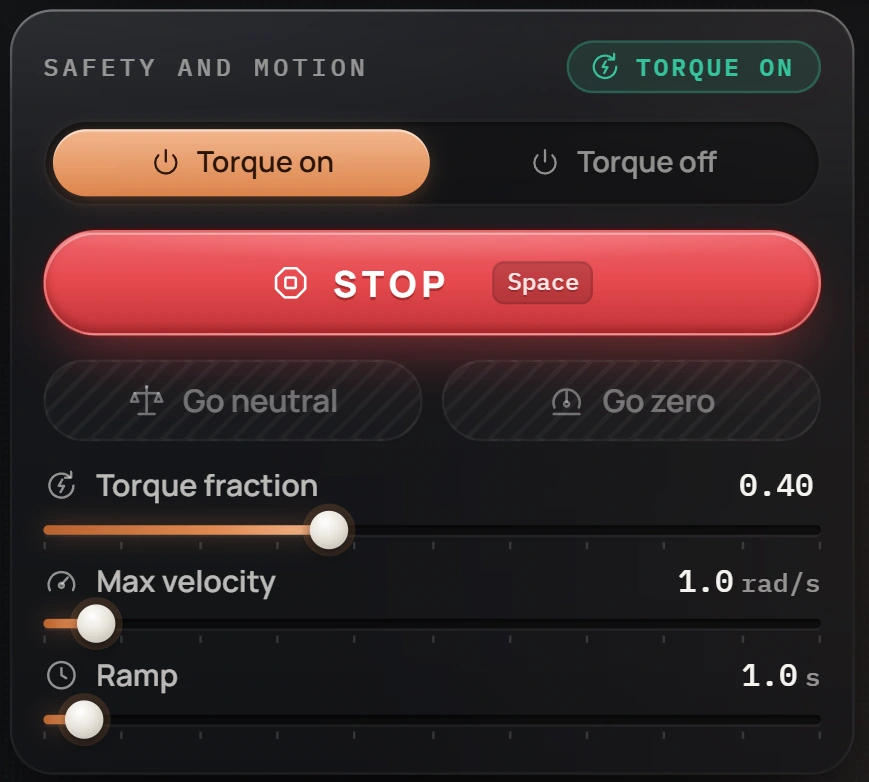
In Safety and motion, drag Torque fraction to 0.40 and Max velocity to 1.0 rad/s. The robot enforces both on its own side, whatever the console or your code asks for later. At 40 % of its current limit the arm is strong enough to move itself and weak enough that you can stop it by hand.
Arm and move one joint
Flip ARM on. Its L and R chips turn red: both arms are now movable (on a single arm only one matters). Click the row of a joint in Joint states, for example J2, the shoulder. A Jog card opens with a stick and four step buttons.
Click +0.05 a few times and the shoulder lifts by 0.05 rad per click. For a continuous move, hold the stick and pull: the further you pull, the faster the joint turns, and it stops when you let go. The real joint follows at no more than the velocity you allowed.
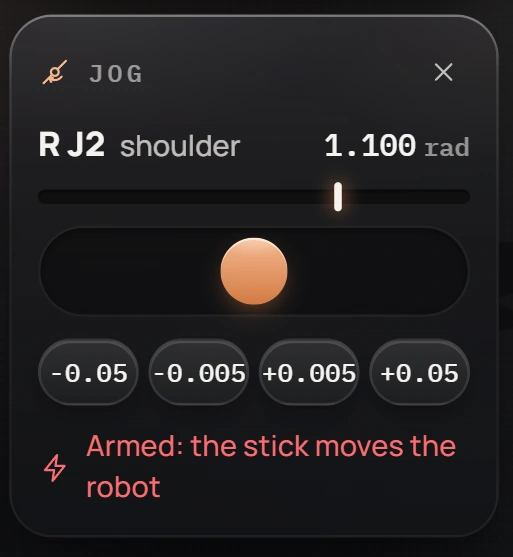
Each click sends one absolute target for that joint, the current target plus the step. With J2 at 1.10 rad, one +0.05 click is:
robot.control.set_joints_absolute({"J02-R": 1.15})Press Space at any moment to stop. STOP cancels whatever the console is doing and the arm holds where it is. Flip ARM off when you are done: the arm keeps holding its pose, and no command from the console can move it until you arm again.
Do the same from Python
The adapter has one owner at a time, so click Exit in the top left corner first. That ends the console's session and frees the arm.
Save this as first_moves.py in the kit folder:
import time
from makiina.robot import Robot

robot = Robot.connect_local()                   # the arm on this PC
print(robot.parts)                              # ["right_arm"]

robot.safety.set_torque_fraction(0.4)
robot.safety.set_max_joint_velocity(1.0)        # rad/s at the joint

print(robot.sensors.get_joints())               # where every joint is, in rad
robot.control.set_joints_relative({"J02-R": 0.05})
time.sleep(2)                                   # give the shoulder time to get there

robot.control.stop()                            # hold the pose
robot.disconnect()
Run it with the kit's Python:
.venv\Scripts\python.exe first_moves.py         # Windows
.venv/bin/python first_moves.py                 # Linux
Robot.connect_local() starts the same robot server the console used, on the same adapter, and returns once joint state is flowing. The shoulder lifts by 0.05 rad and holds. On a left arm the joints are called J01-L to J06-L; robot.model.joint_names() lists them.