
ReferenceCalibration and firmware
Calibration and firmware
The maintenance tools of the Robot Console: re-calibrating a unit after mechanical work, updating drive firmware, and looking after a robot's software.
MAKIINA arms and robots leave the factory calibrated and with their firmware loaded. You do not need anything on this page to use them. Come here after mechanical work on a joint, when a joint turns the wrong way, when a new firmware version ships with the SDK, or when you build a unit from bare actuators.
The tools are on every unit's row in the Robot Console: Calibrate, Firmware and Software. For an arm on your PC they run on your PC. For a robot in your fleet they run on the robot's own computer and you use them from your browser, so your PC and the robot must be on the same network. While Calibrate or Firmware holds a robot's buses, the robot shows Maintenance in the fleet list and accepts no sessions; its services come back when you close the tool.
Re-calibrate a unit
Each drive stores in its own memory which part and joint it is, its zero, its direction and its motor type. The calibration wizard writes those values. It does not write any file.
Re-zero only on purpose. Zeroing rewrites what the boards store, so the arm's reference pose changes for every program that uses it afterwards.
Put the unit at its zero pose
Switch the unit off. Put every joint on its alignment notch with the arm stretched straight out, and open the gripper fully; a head looks straight ahead. Switch it on again. The drives start holding that pose, and everything the wizard stores is measured from it.
Walk the wizard
Open Calibrate on the unit's row, then Open the wizard. It has seven steps along the top; you can go back to any of them.
- Unit. Choose left arm, right arm or head. The wizard looks at every adapter for about a second and picks the one whose boards match.
- Boards. The boards found on that adapter, seven for an arm with a gripper. If one is missing, check its power and the CAN cable and sweep again.
- Identify. Press Nudge on a board: its joint moves by 5 degrees and back, a little more with every repeat. Choose which joint moved. The 3D view lights up the joint you are matching. Boards that already know their joint arrive filled in, so you only confirm them.
- Direction. Press Move +5° and watch the real joint. It must turn the way the 3D twin turns; if it turns the other way, press the other sign and move again. The sign is stored on the board the moment you press it. For the gripper, positive closes the fingers.
- Zero. Check the pose once more and press Zero now. Every board stores the pose it is holding as its zero and keeps holding, so nothing goes limp.
- Store. Store on the boards writes part, joint number, direction and the calibrated flag to every board.
- Done. The unit describes itself again: plug it into any PC with the SDK and it appears ready.
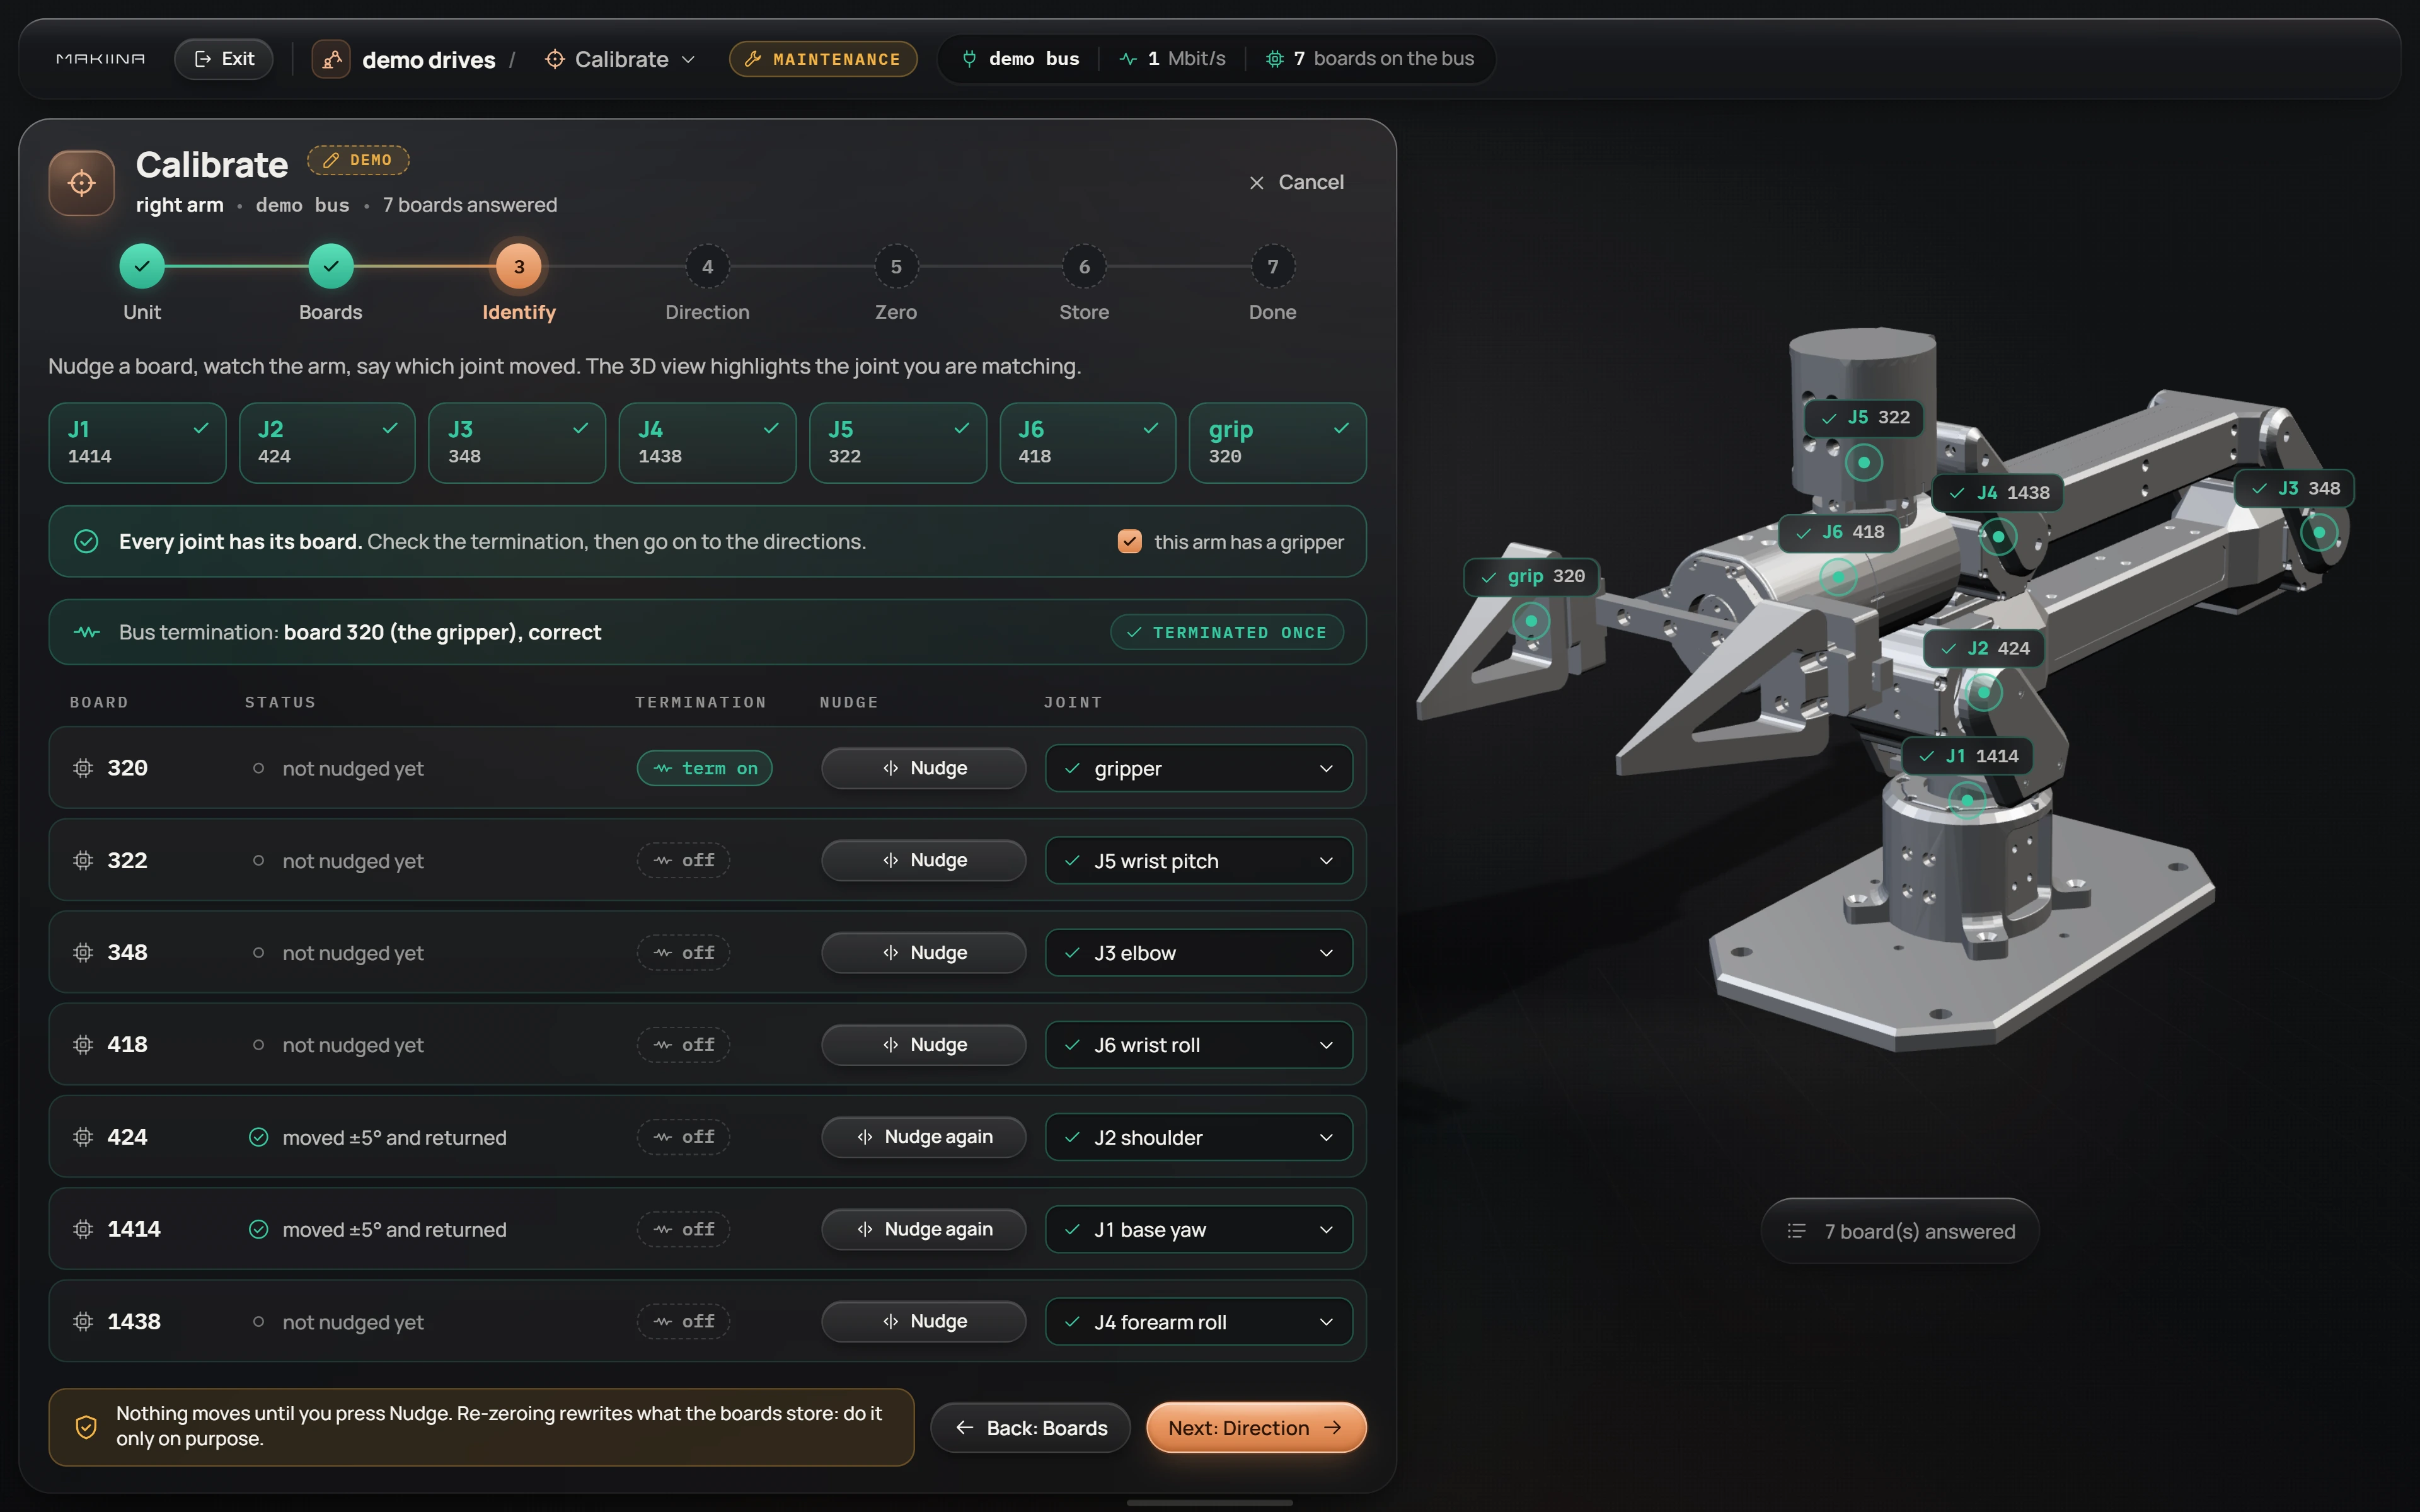
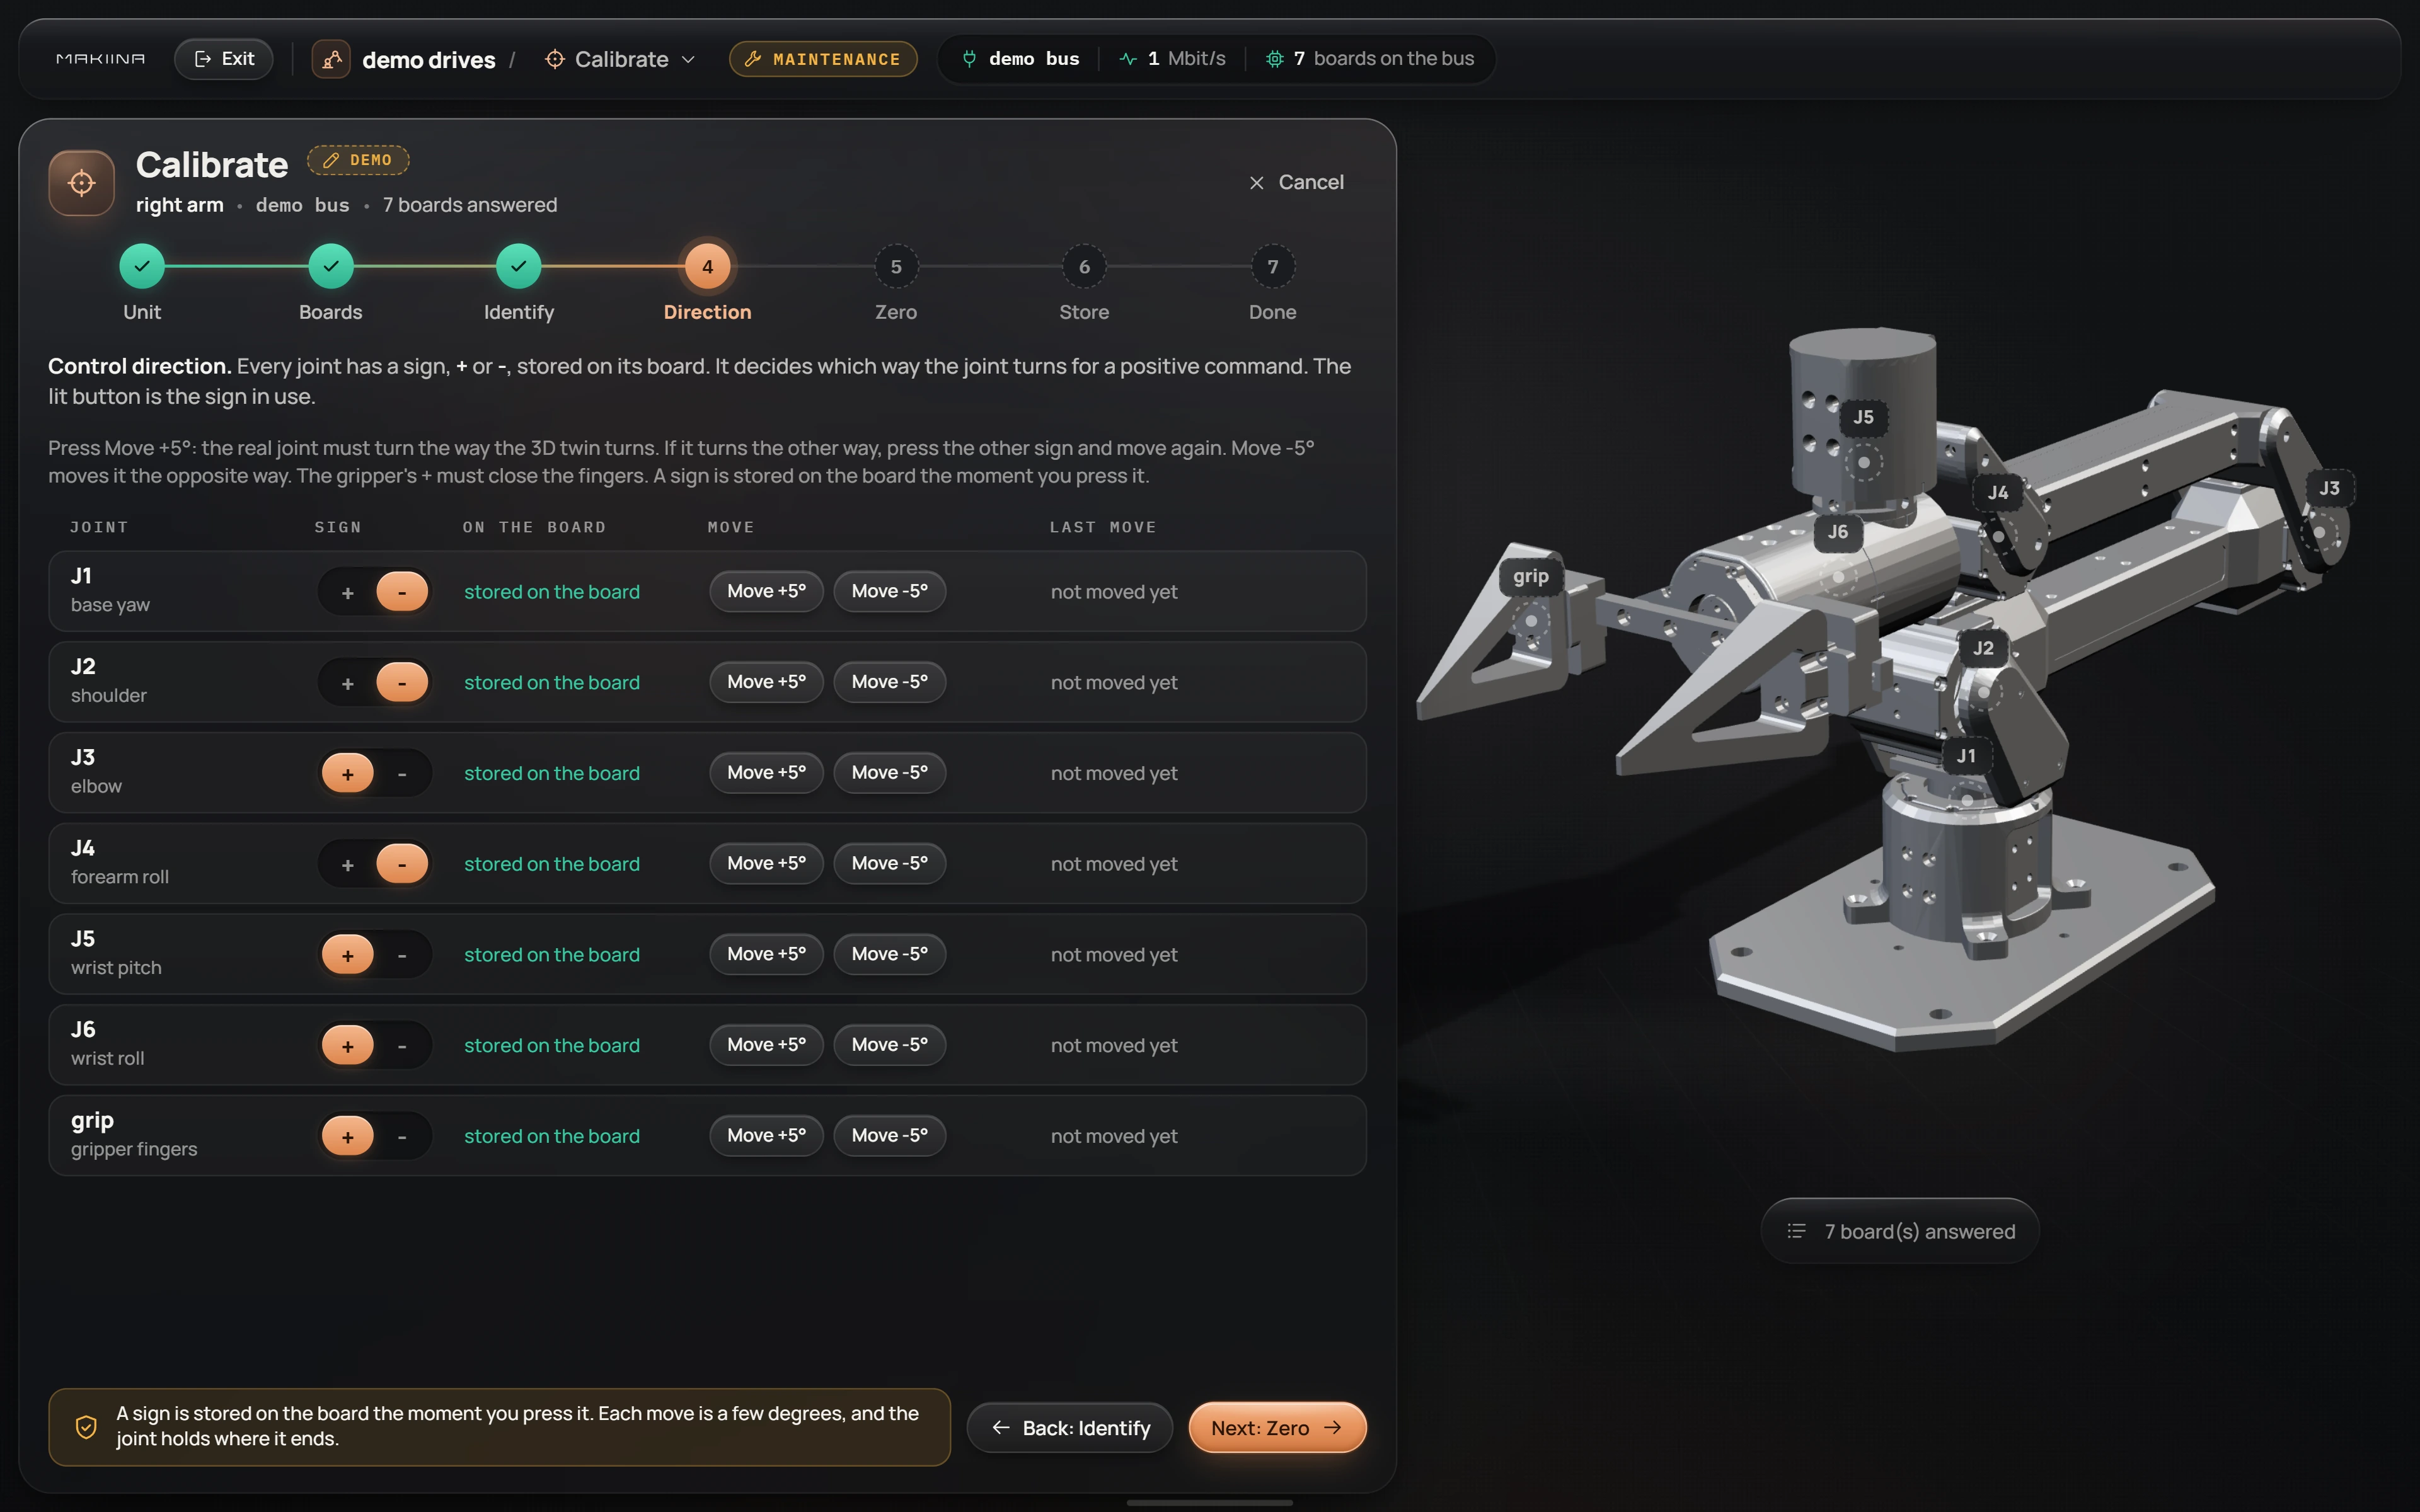
Bus termination
The last board on a bus must terminate it: the gripper on a stock arm, or J6 when the arm has no gripper. The Identify step checks it and says so. The termination buttons on each board's row move it.
Update drive firmware
The SDK ships the current drive firmware, and the Firmware page brings boards up to it. Open Firmware on the unit's row and let it scan the bus.
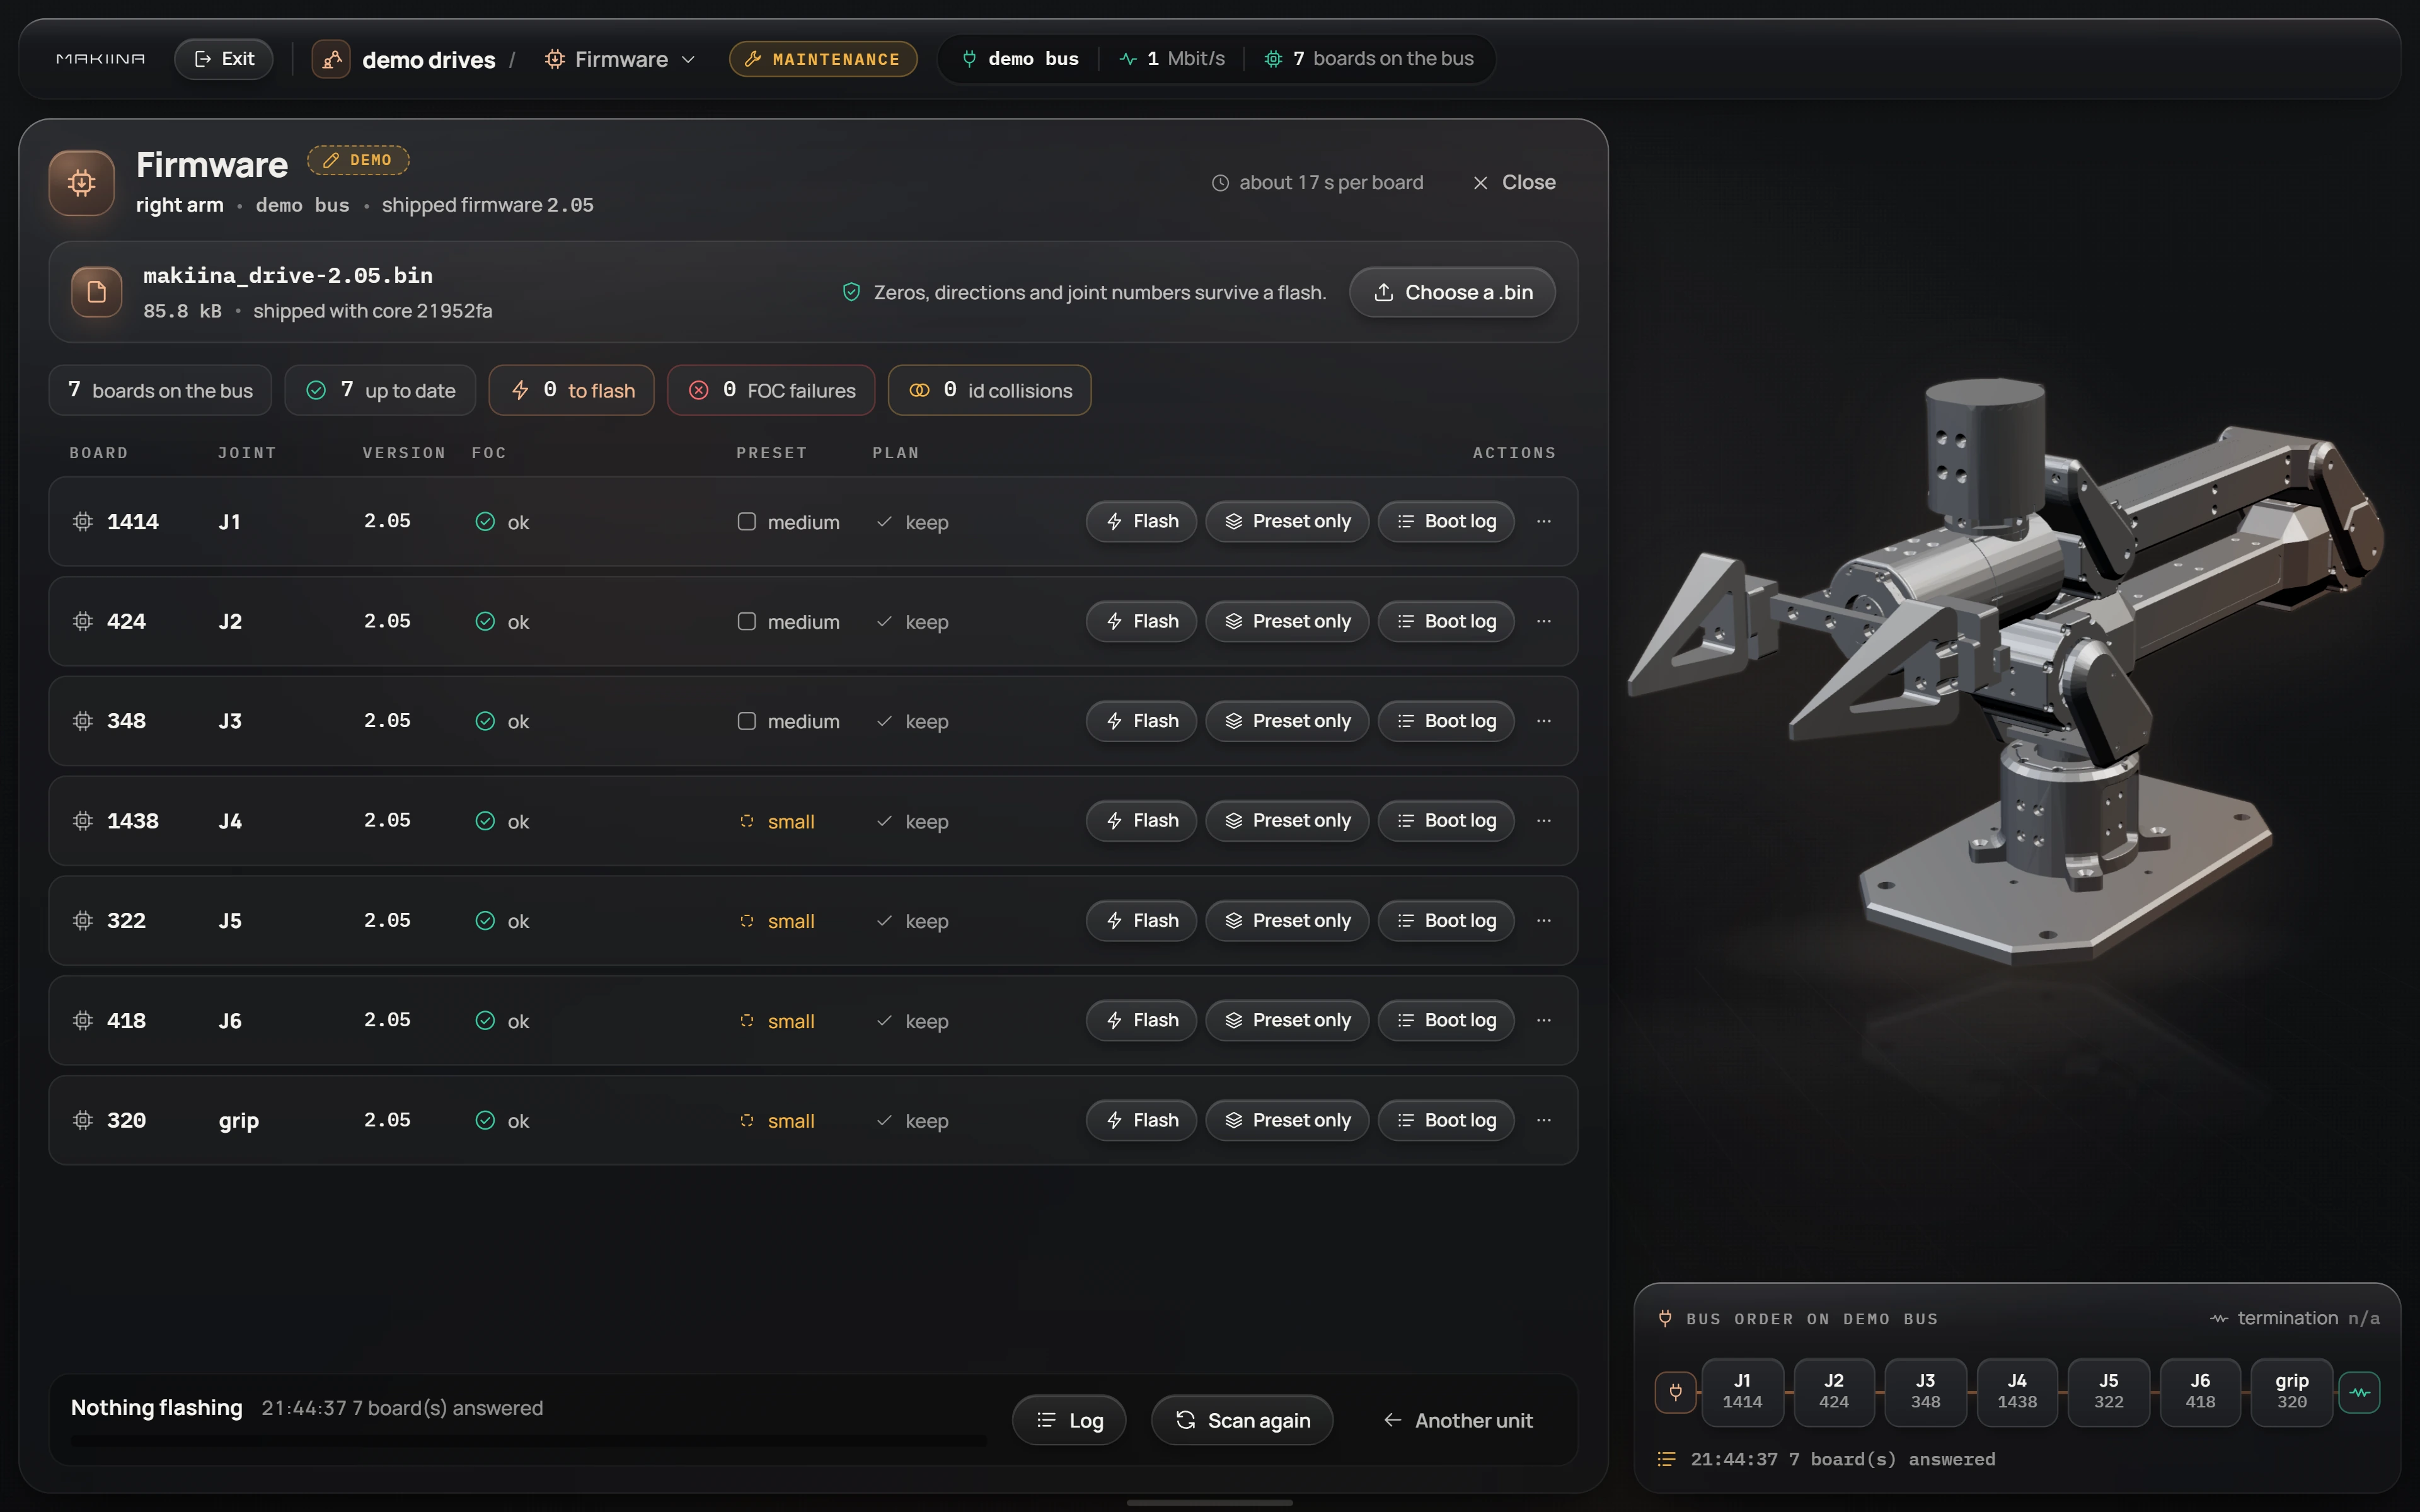
Every board is listed with its joint, firmware version, whether its motor controller started correctly (FOC), its motor preset and the plan for it. Flash loads the shipped image onto that one board; it takes about 17 seconds and the board restarts on its own. Preset only stores a new motor preset without flashing. Boot log shows what the board reported when it last started.
- Each press flashes one board. Let it finish before you start the next.
- A flash keeps everything the board stores: part, joint number, zero, direction, preset and its compensation tables.
- Presets:
mediumfor J1 to J3,smallfor J4 to J6 and the gripper. A board with the wrong preset shows FOC failed; choose the right one and press Preset only. - Choose a .bin loads another image for the next flash, for example a newer one you received.
Two boards on one id
Each board takes its CAN id from its chip's serial number, and on rare occasions two boards on one bus draw the same id. The scan then shows 2 boards on this id. With firmware 2.05 on both, Resolve moves one of them to a free id. The Calibrate wizard refuses a bus in that state until it is resolved.
Look after a robot's software
The Software page shows the computer a unit runs on: its name, system, disk space, and the version of the SDK it runs. For a robot in your fleet it also lists the robot's services with their state and logs, restarts a service, and reboots the robot (press and hold Reboot).
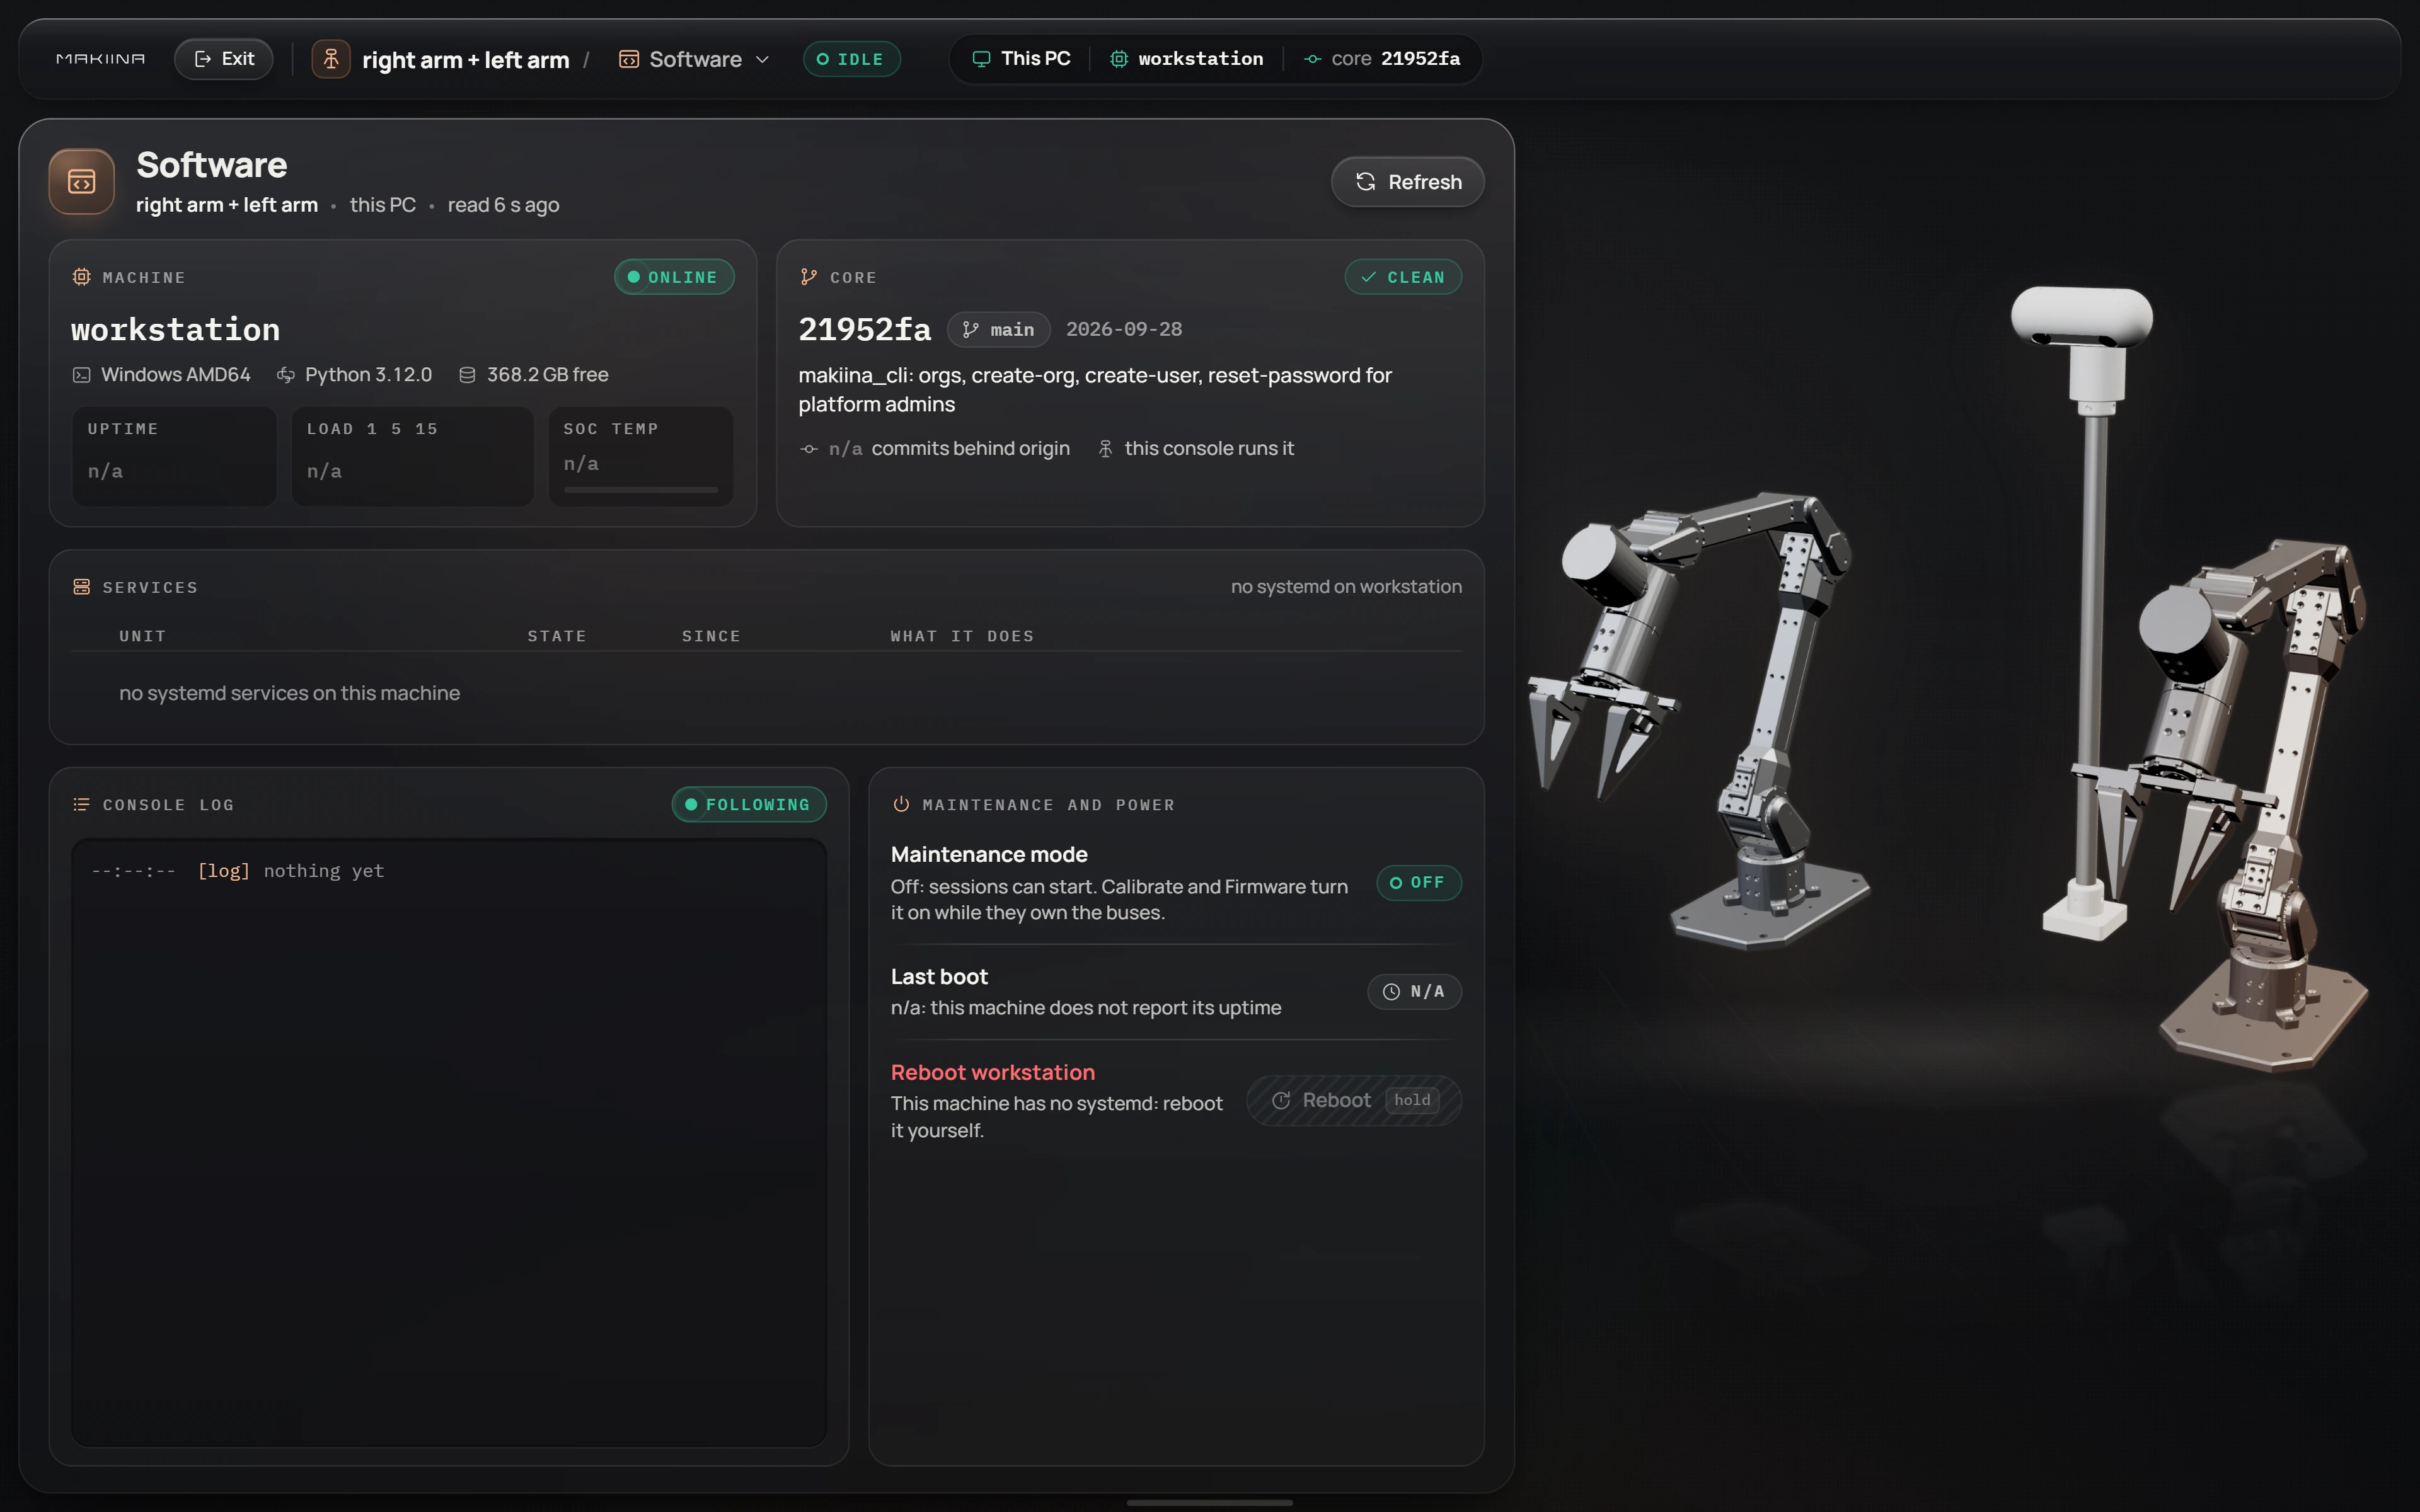
Update from this PC sends the SDK from your PC to a fleet robot over the network and installs it there.
Calibrate the stereo cameras
A robot's head cameras are calibrated at the factory, and the result lives in robot-calibrations/<robot>/cameras/. It needs redoing only when a camera or its mount moves or a lens is replaced. That procedure uses a checkerboard target and a checkout of the repository; it is described in docs/camera-calibration.md there.
From Python
The tools use public functions you can call yourself, for example to check a bus before a long run:
from makiina.calibration.discovery import discover_bus

for b in discover_bus("candle", "207137C04845500F2:0"):
    print(b.id, b.version, b.part, b.label, b.calibrated)
The drive-level calls (zero, direction, part, joint number, preset, CAN id, firmware) are listed under Identity and calibration in the actuator reference.